TechSuite Online Dashboard
The Online Dashboard at repairtechsolutions.com is where you follow repairs as they run, keep every report, set up your branding and integrations, and manage your team. It works on phones and tablets as well as desktops.
The menu down the left side is in four groups:
- Activity, Downloads and Reports
- Brand & Reports: Branding and Report Settings
- Integrations & Automation: Integrations, Tool Configuration, Custom Apps and Procedures
- Organization: Info and Security, Users and Billing
Your own details are under Profile, in the menu at the bottom of the sidebar.
Activity and On the Bench
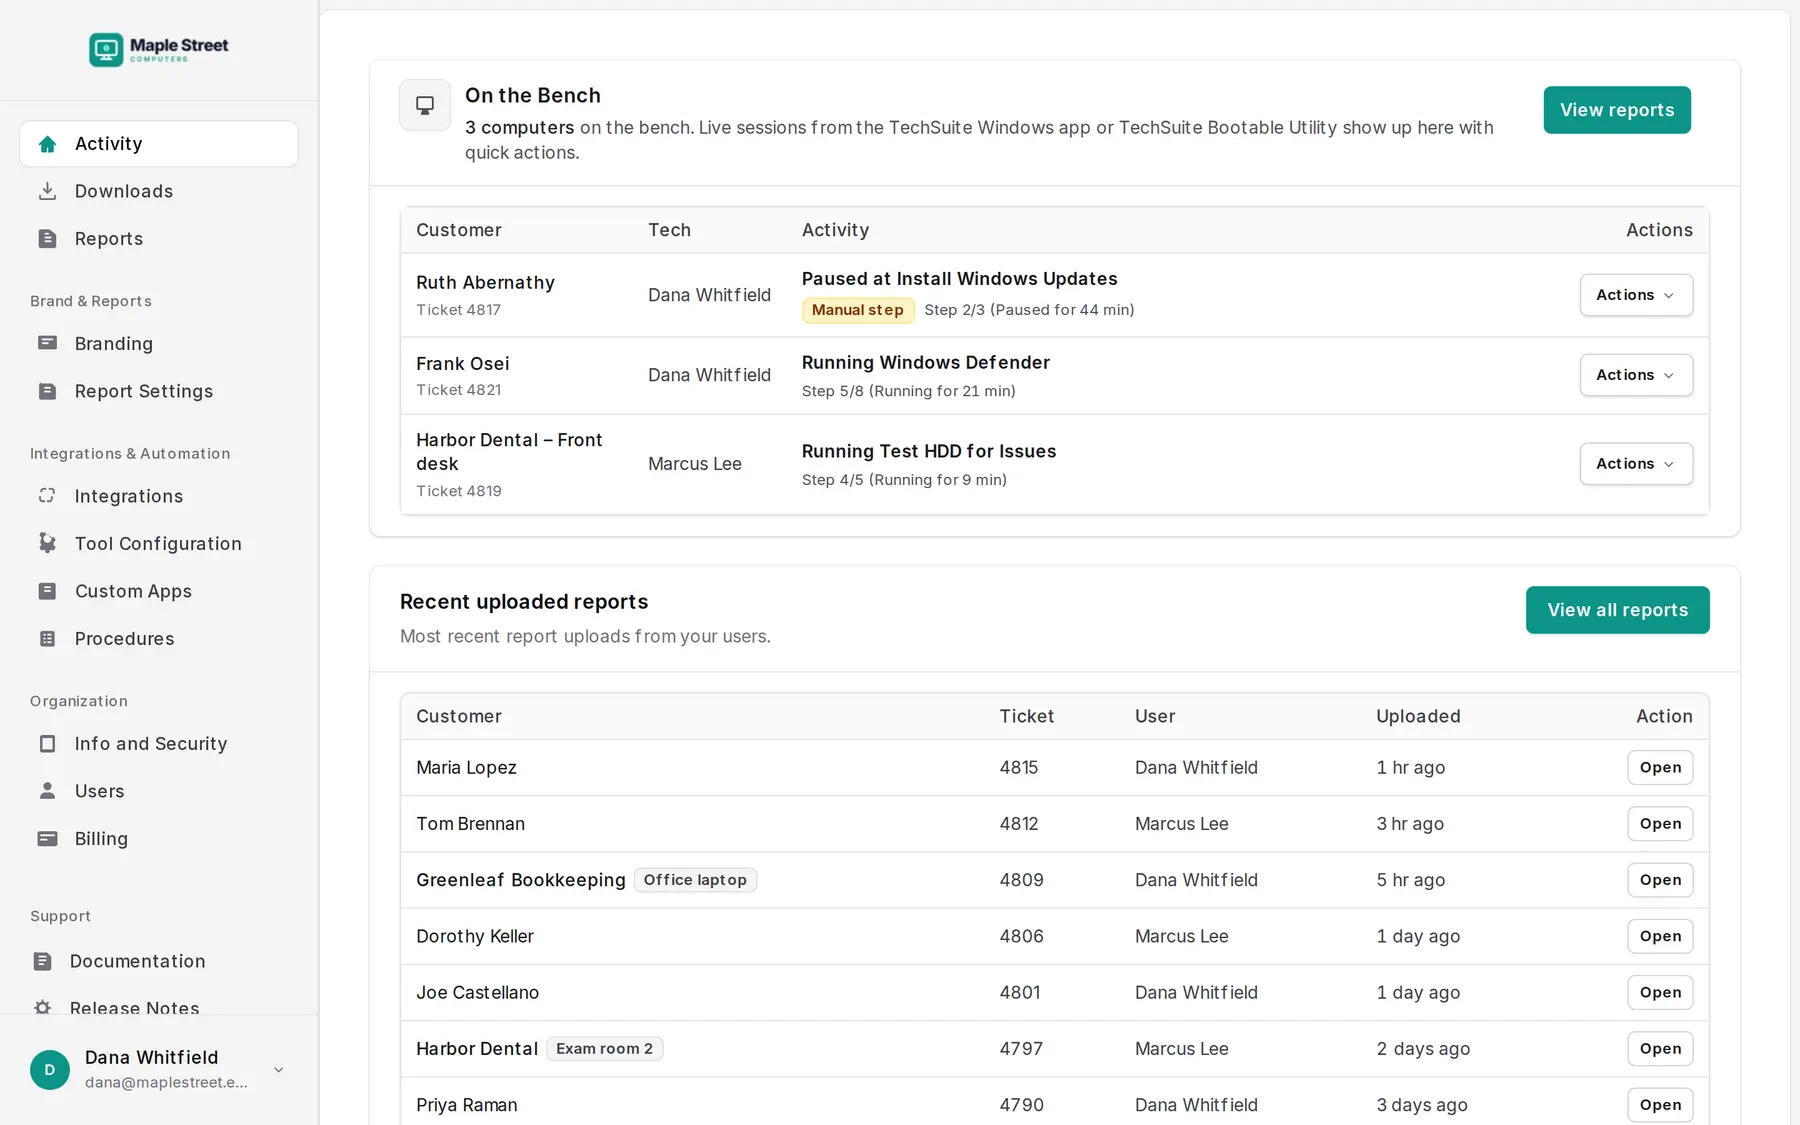
Activity is the dashboard’s home page. On the Bench at the top shows every computer TechSuite is working on right now: the customer and ticket, the technician, and what’s happening. That might be the tool that’s running, a Manual step waiting for a technician, or an idle session. It refreshes every 15 seconds.
Each row’s Actions menu can open the report so far, even before the run finishes. It can also start a remote session (see below). Recent uploaded reports lists the latest finished reports.
Launching a remote session
You can have TechSuite launch your remote support tool on a computer that’s on the bench:
- Go to Integrations → Startup Executables and upload your remote support tool’s executable. Only the account owner can do this.
- On Activity, open the computer’s Actions menu and choose Launch remote session.
TechSuite downloads and runs the executable on that computer. A startup executable also runs whenever TechSuite starts, so you can use it for any program you want on every machine you work on.
Reports
Every report TechSuite uploads is kept on the Reports page. There’s no limit on how many you keep. Search by customer, ticket or technician, and sort by any column. Click a ticket number to see every report for that ticket.
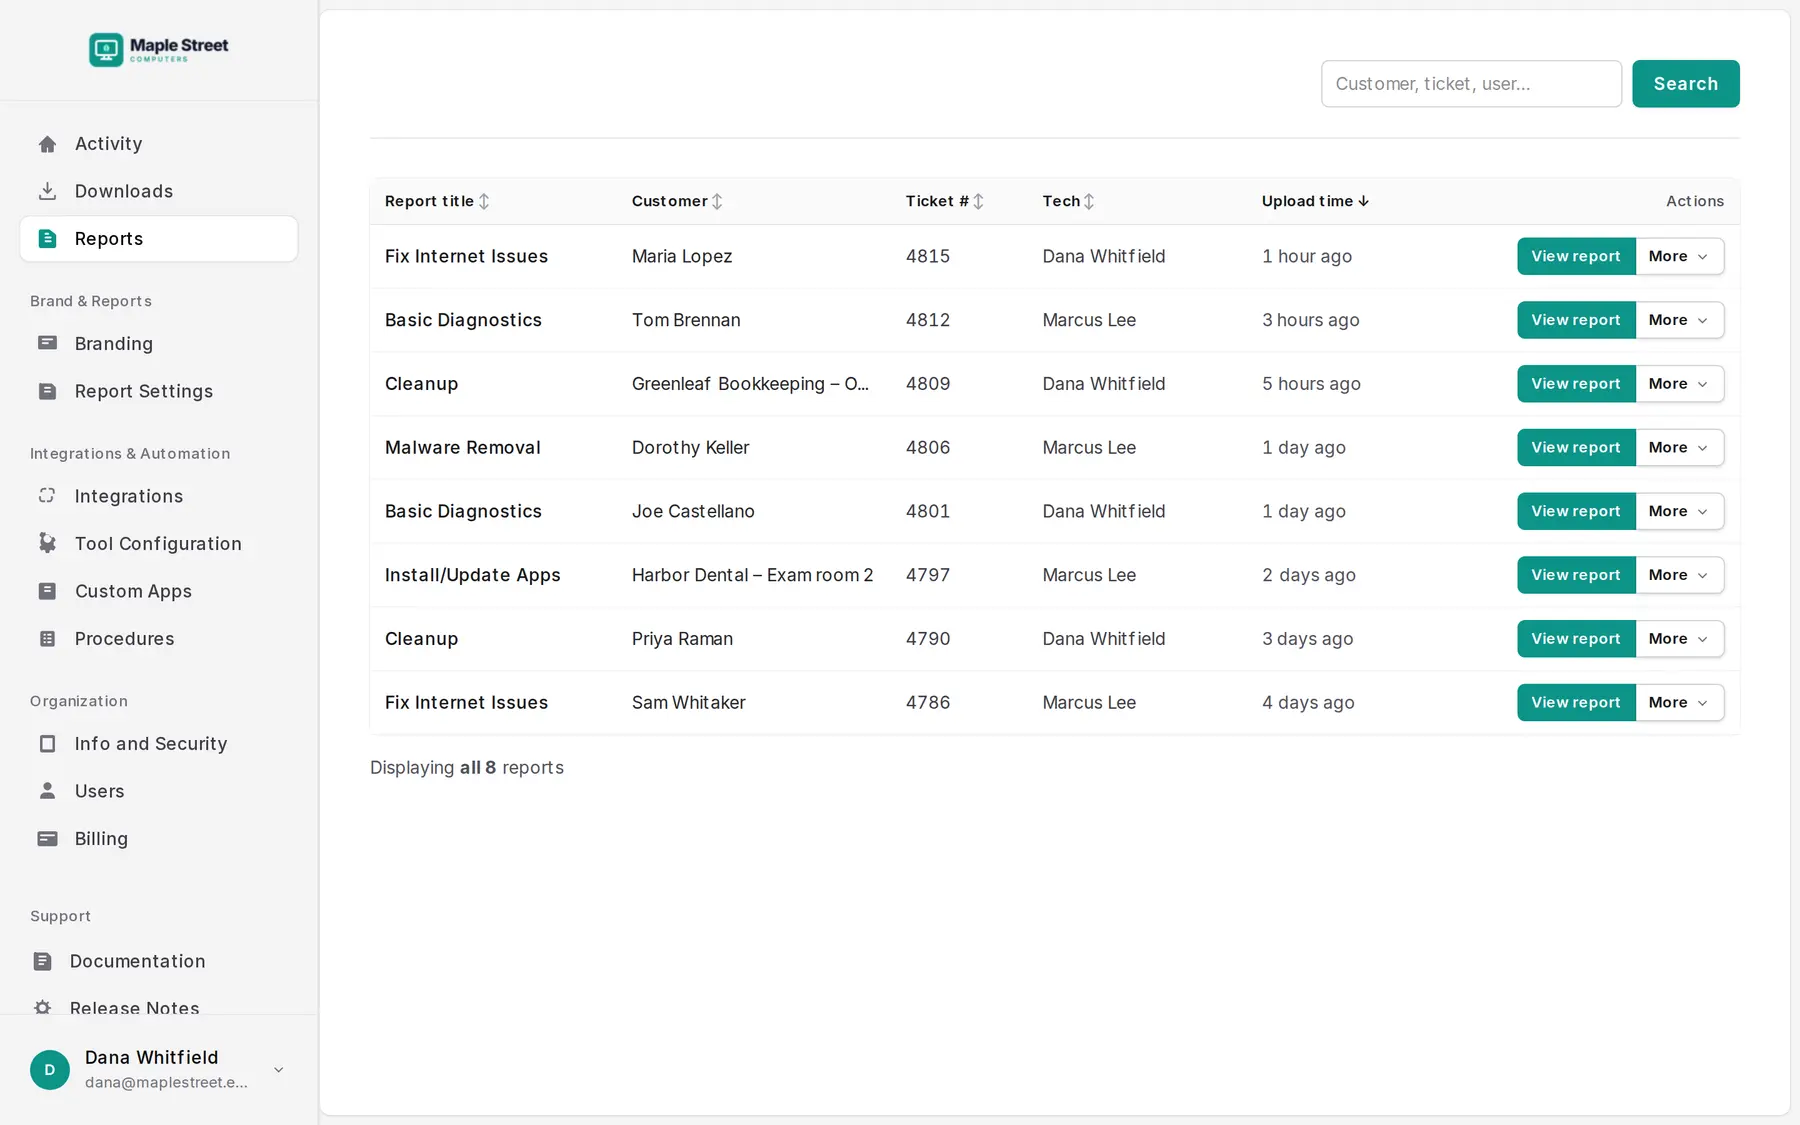
Click View report to open a report. The More menu next to it has:
- View options for each of your report layouts
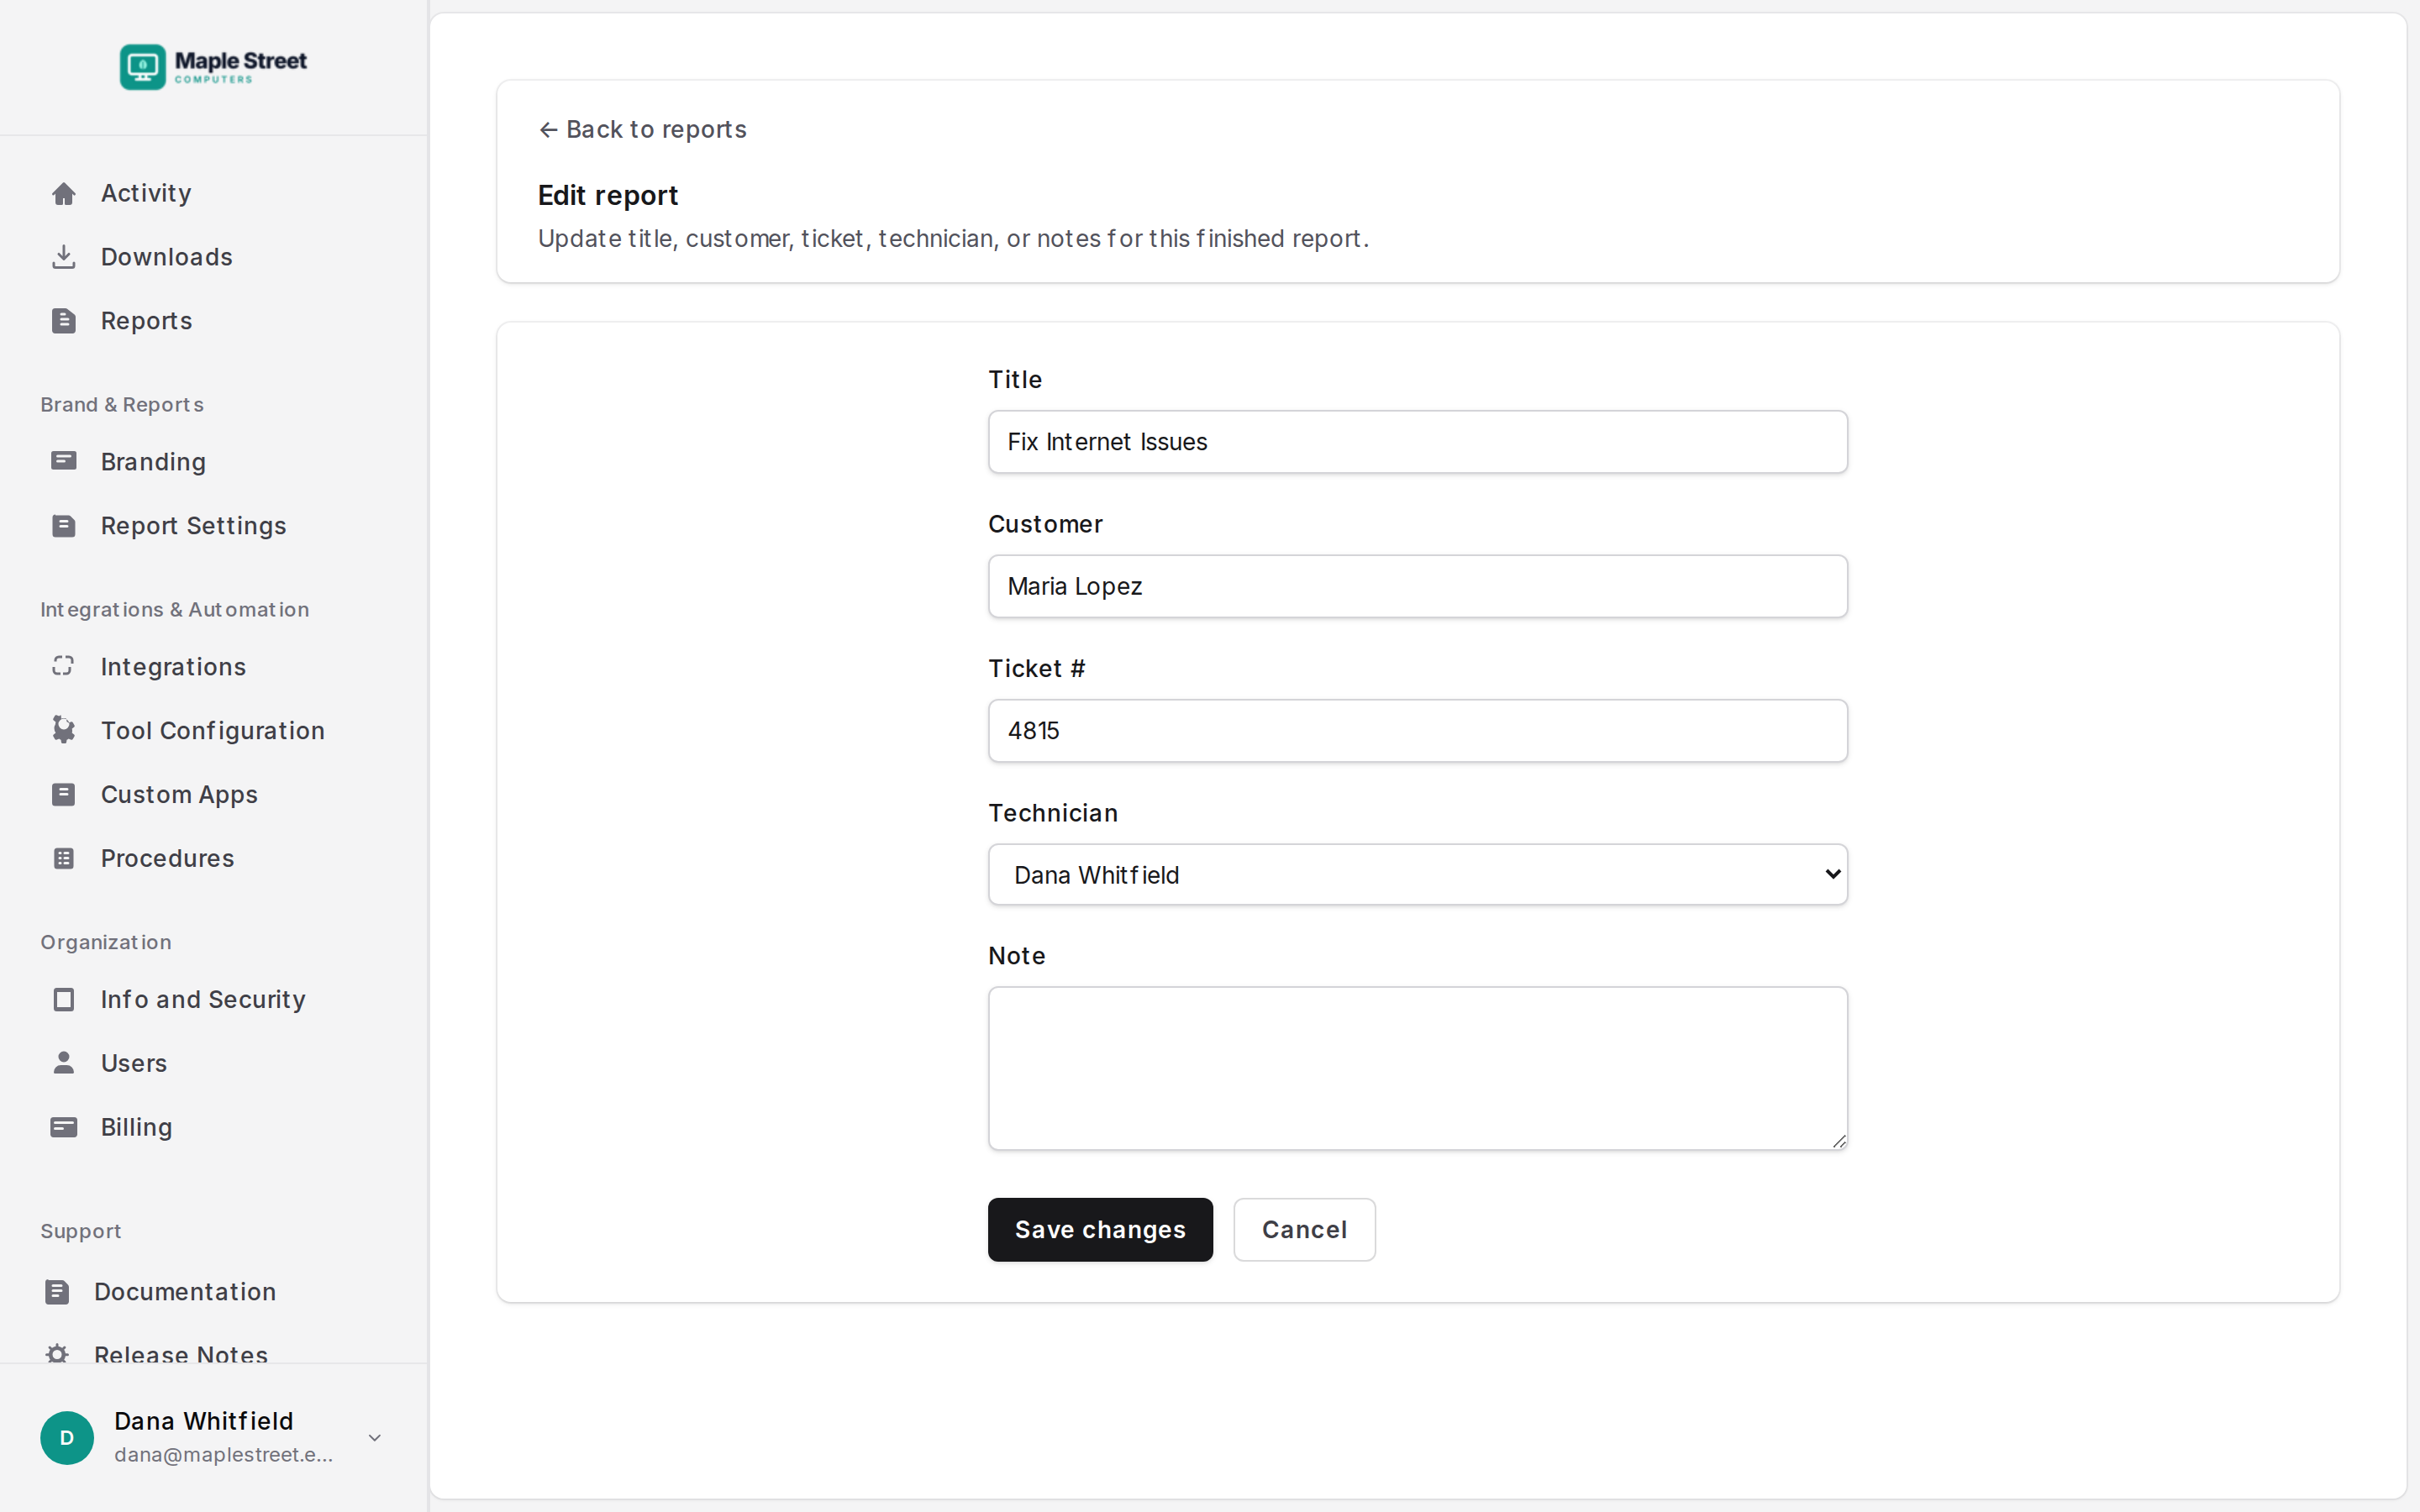
- Edit to change the title, customer, ticket number, technician or note
- Show Note, when the report has one
- Delete, which can’t be undone
AI summaries
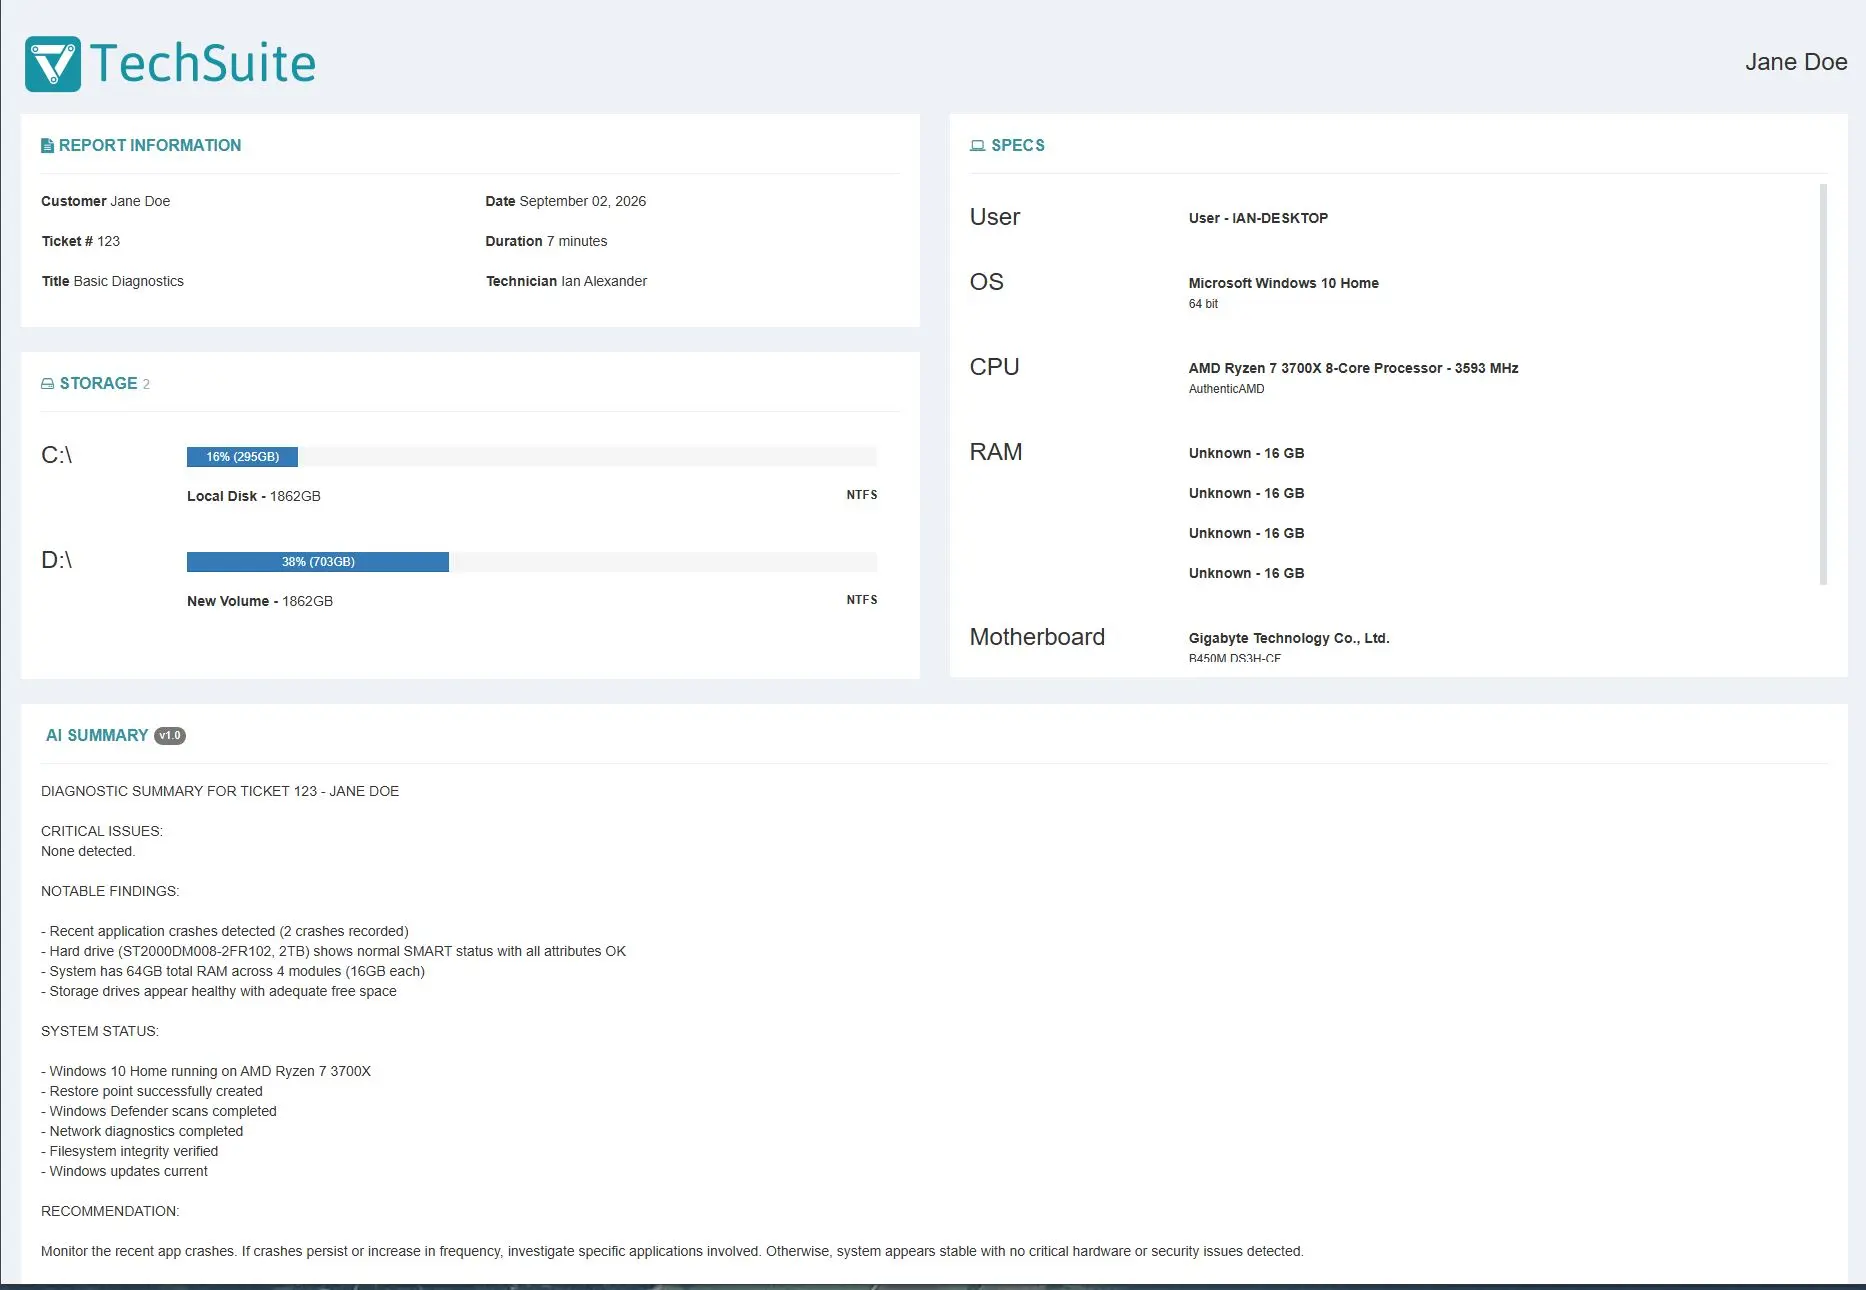
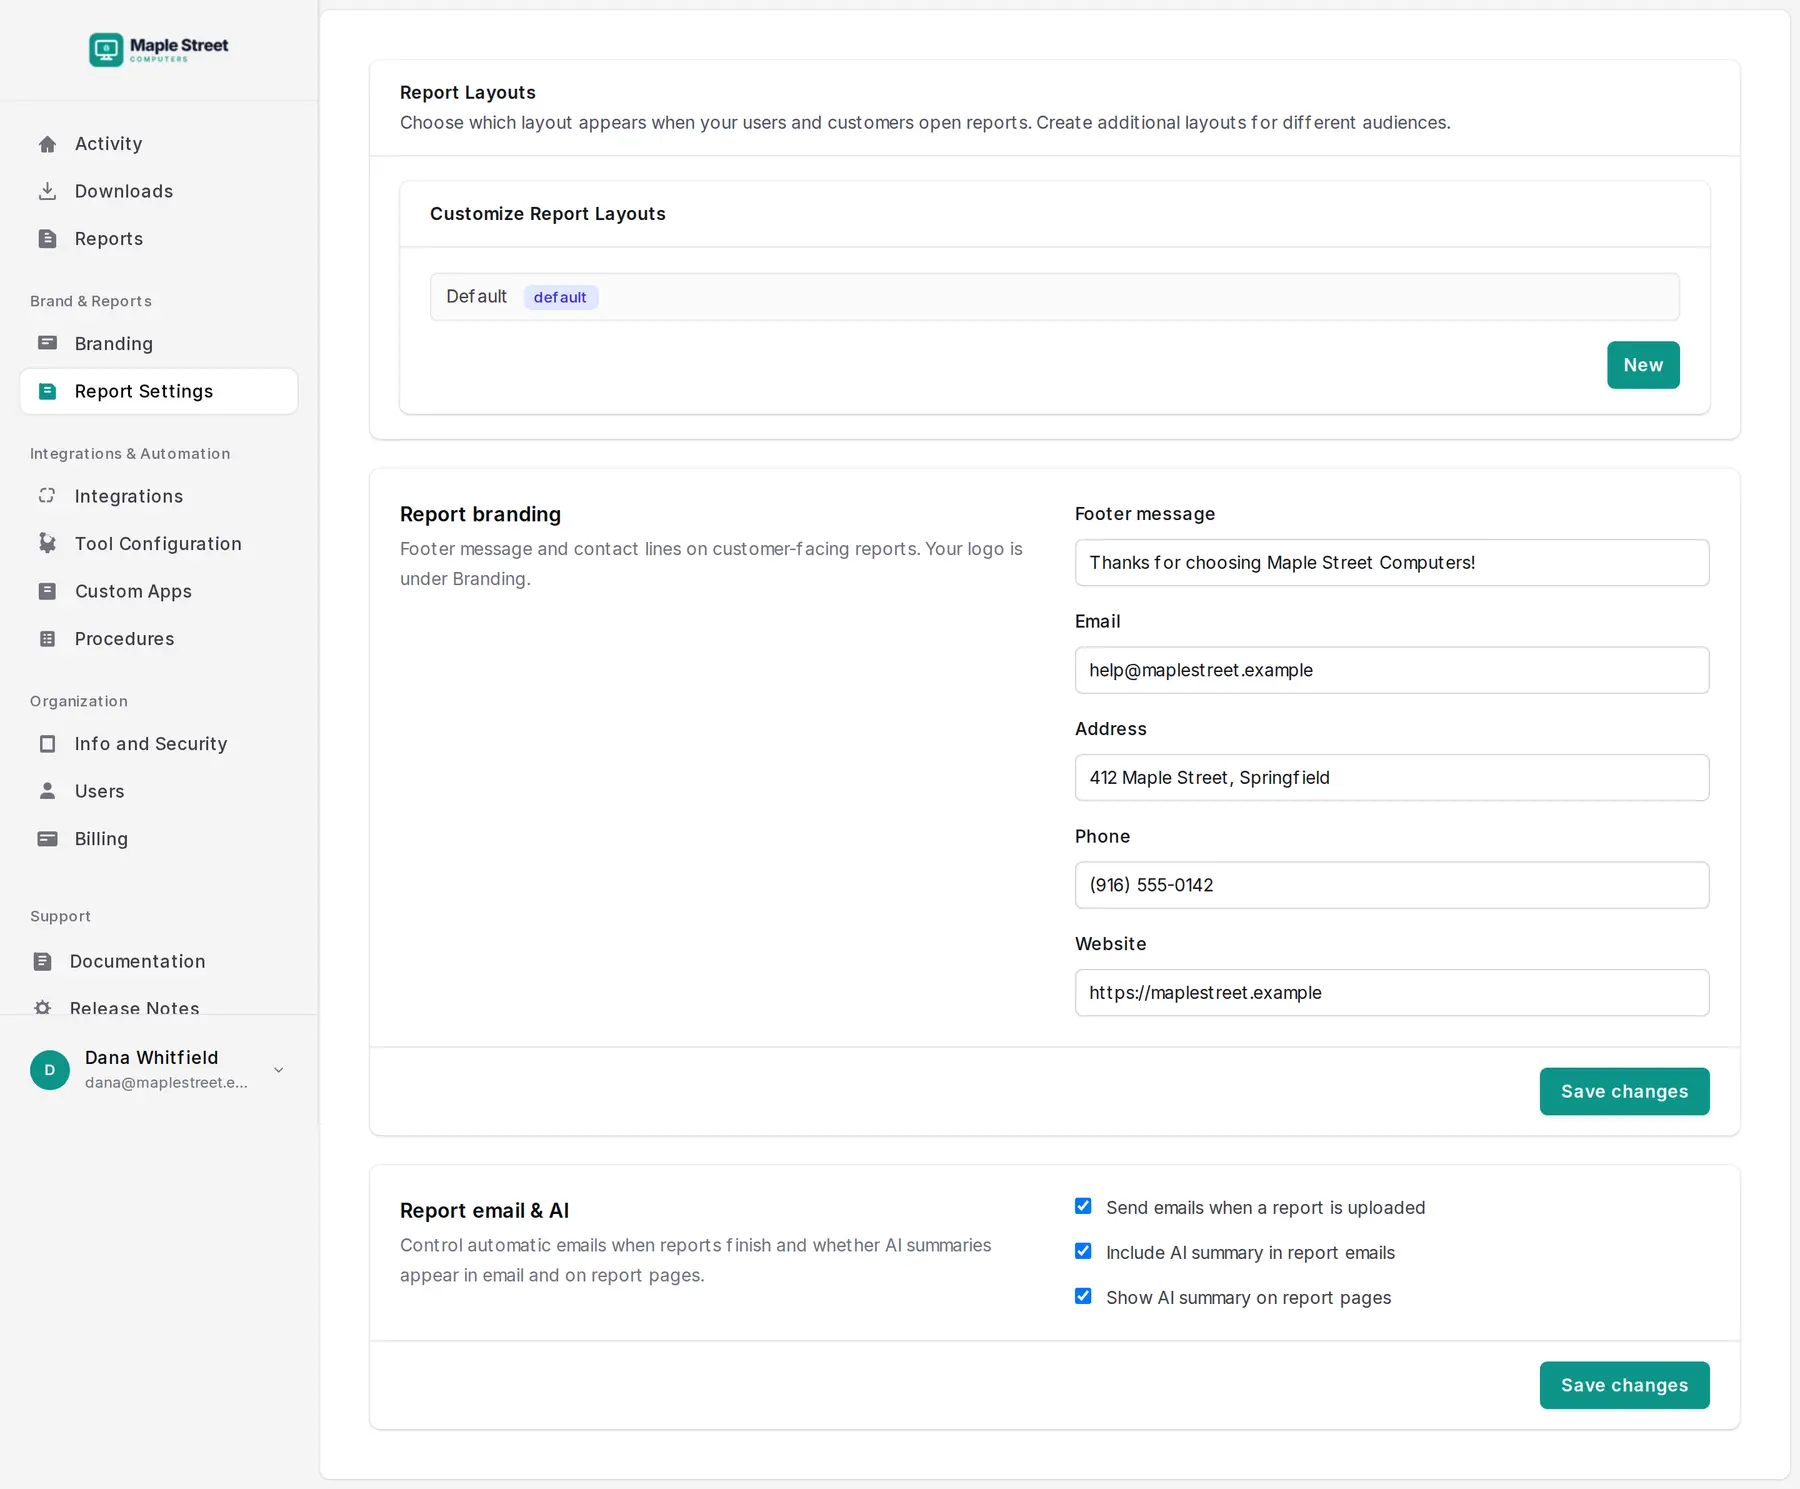
TechSuite can write a short, plain-English summary of each report: what was checked, what was found and what was fixed. Turn it on in Report Settings → Report email & AI:
- Show AI summary on report pages puts the summary at the top of reports in the dashboard.
- Include AI summary in report emails adds it to the email sent when a report is uploaded. Send emails when a report is uploaded must also be on.
Summaries appear only on reports viewed in the dashboard, not on public report layouts or reports opened from TechSuite on the computer. When summaries are on, webhooks include them too.
Report layouts
A report layout decides what a report shows. For example, you might keep one layout with full detail for your technicians, and a shorter one for customers that lists the work done without the technical output. Manage layouts in Report Settings → Report Layouts. Click New to add one.
For each layout, choose whether to show:
- the logo, the title, and notes
- the number of tools run and the time the repair took
- the summary (the list of tools run)
- system information
- Insights (labelled Show Alerts in the form)
- the details of each tool
Tick Public to let anyone with the link view reports in that layout without logging in. That’s the one to share with customers. Public layouts never show the AI summary.
Branding
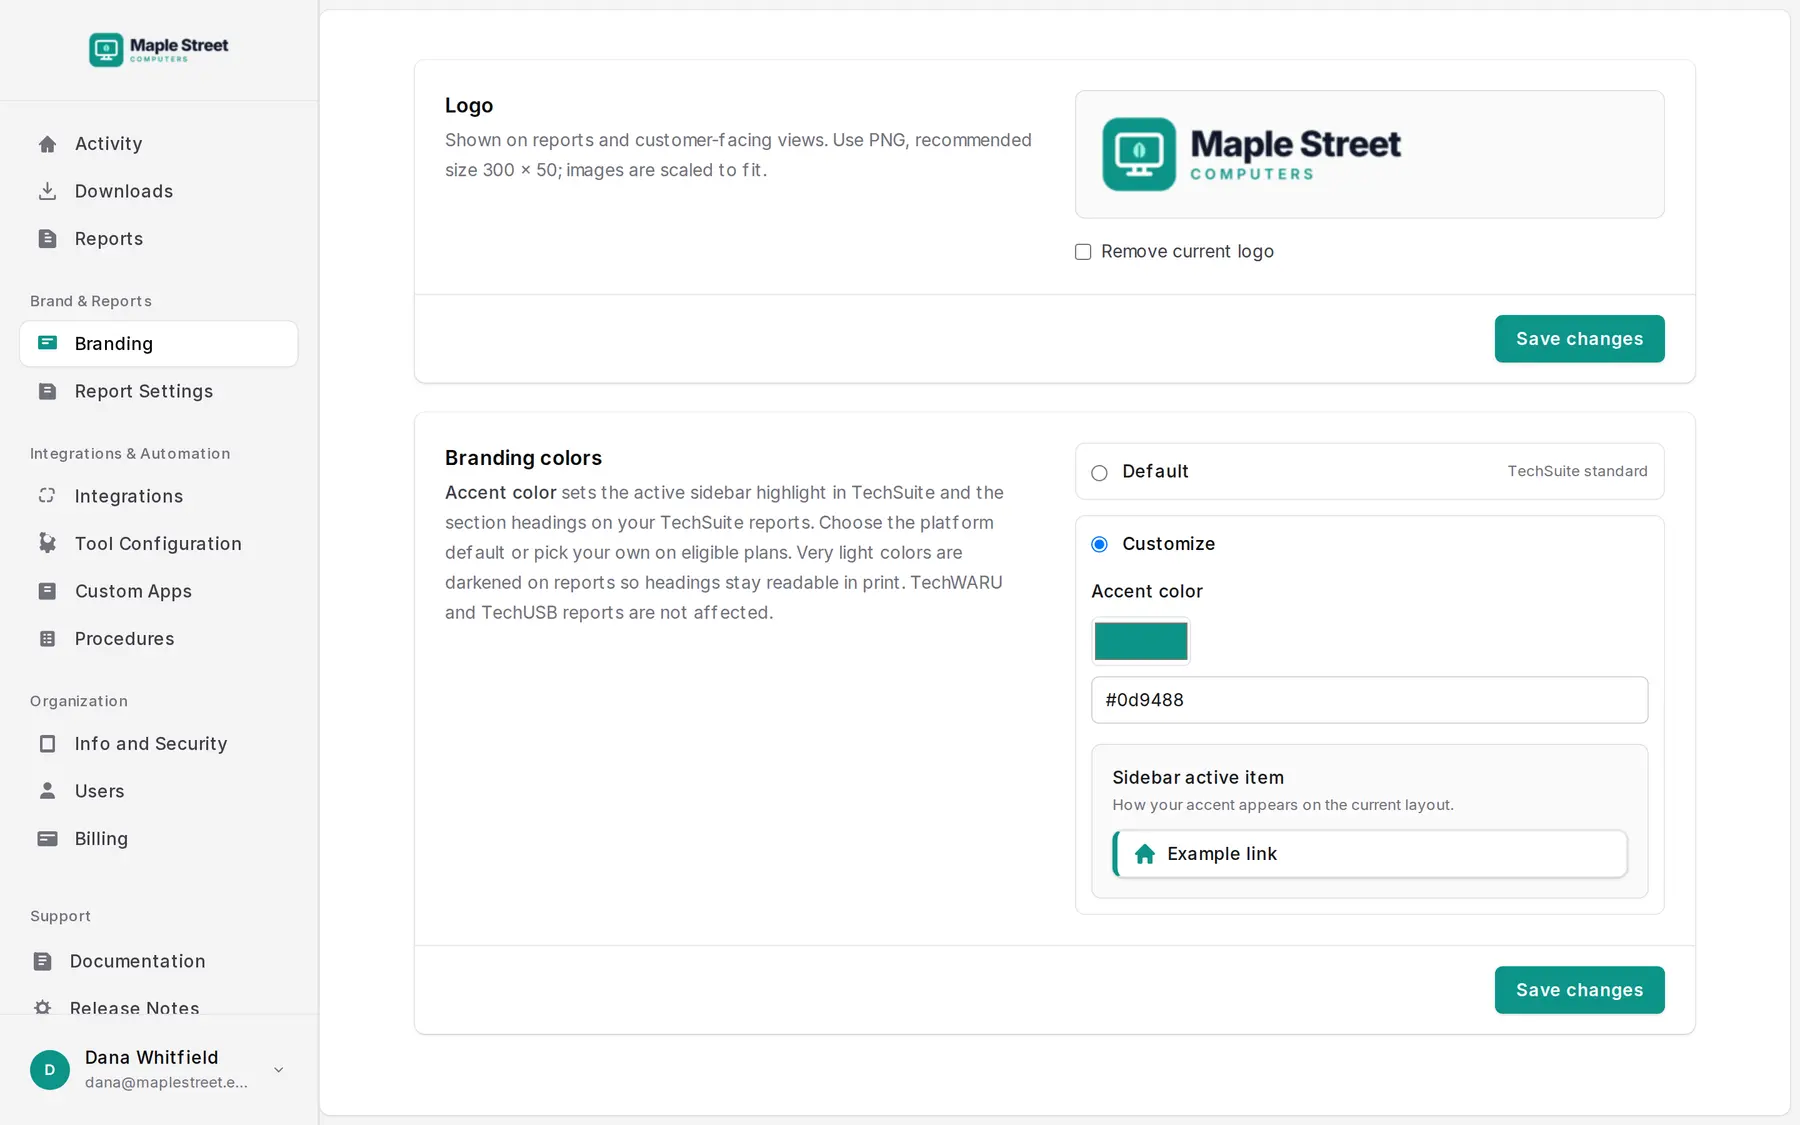
Branding holds your logo and accent color. The logo appears on reports, in the dashboard and in TechSuite. The accent color is used for report headings and dashboard highlights. Choose Customize and pick a color, or keep the default.
The report footer is set in Report Settings → Report branding: a footer message, and your shop’s email, address, phone and website.
Custom branding is included on the Plus and Pro plans (and during your trial), not on Basic. Report settings apply to your whole shop, not to individual technicians.
Custom Apps and Procedures
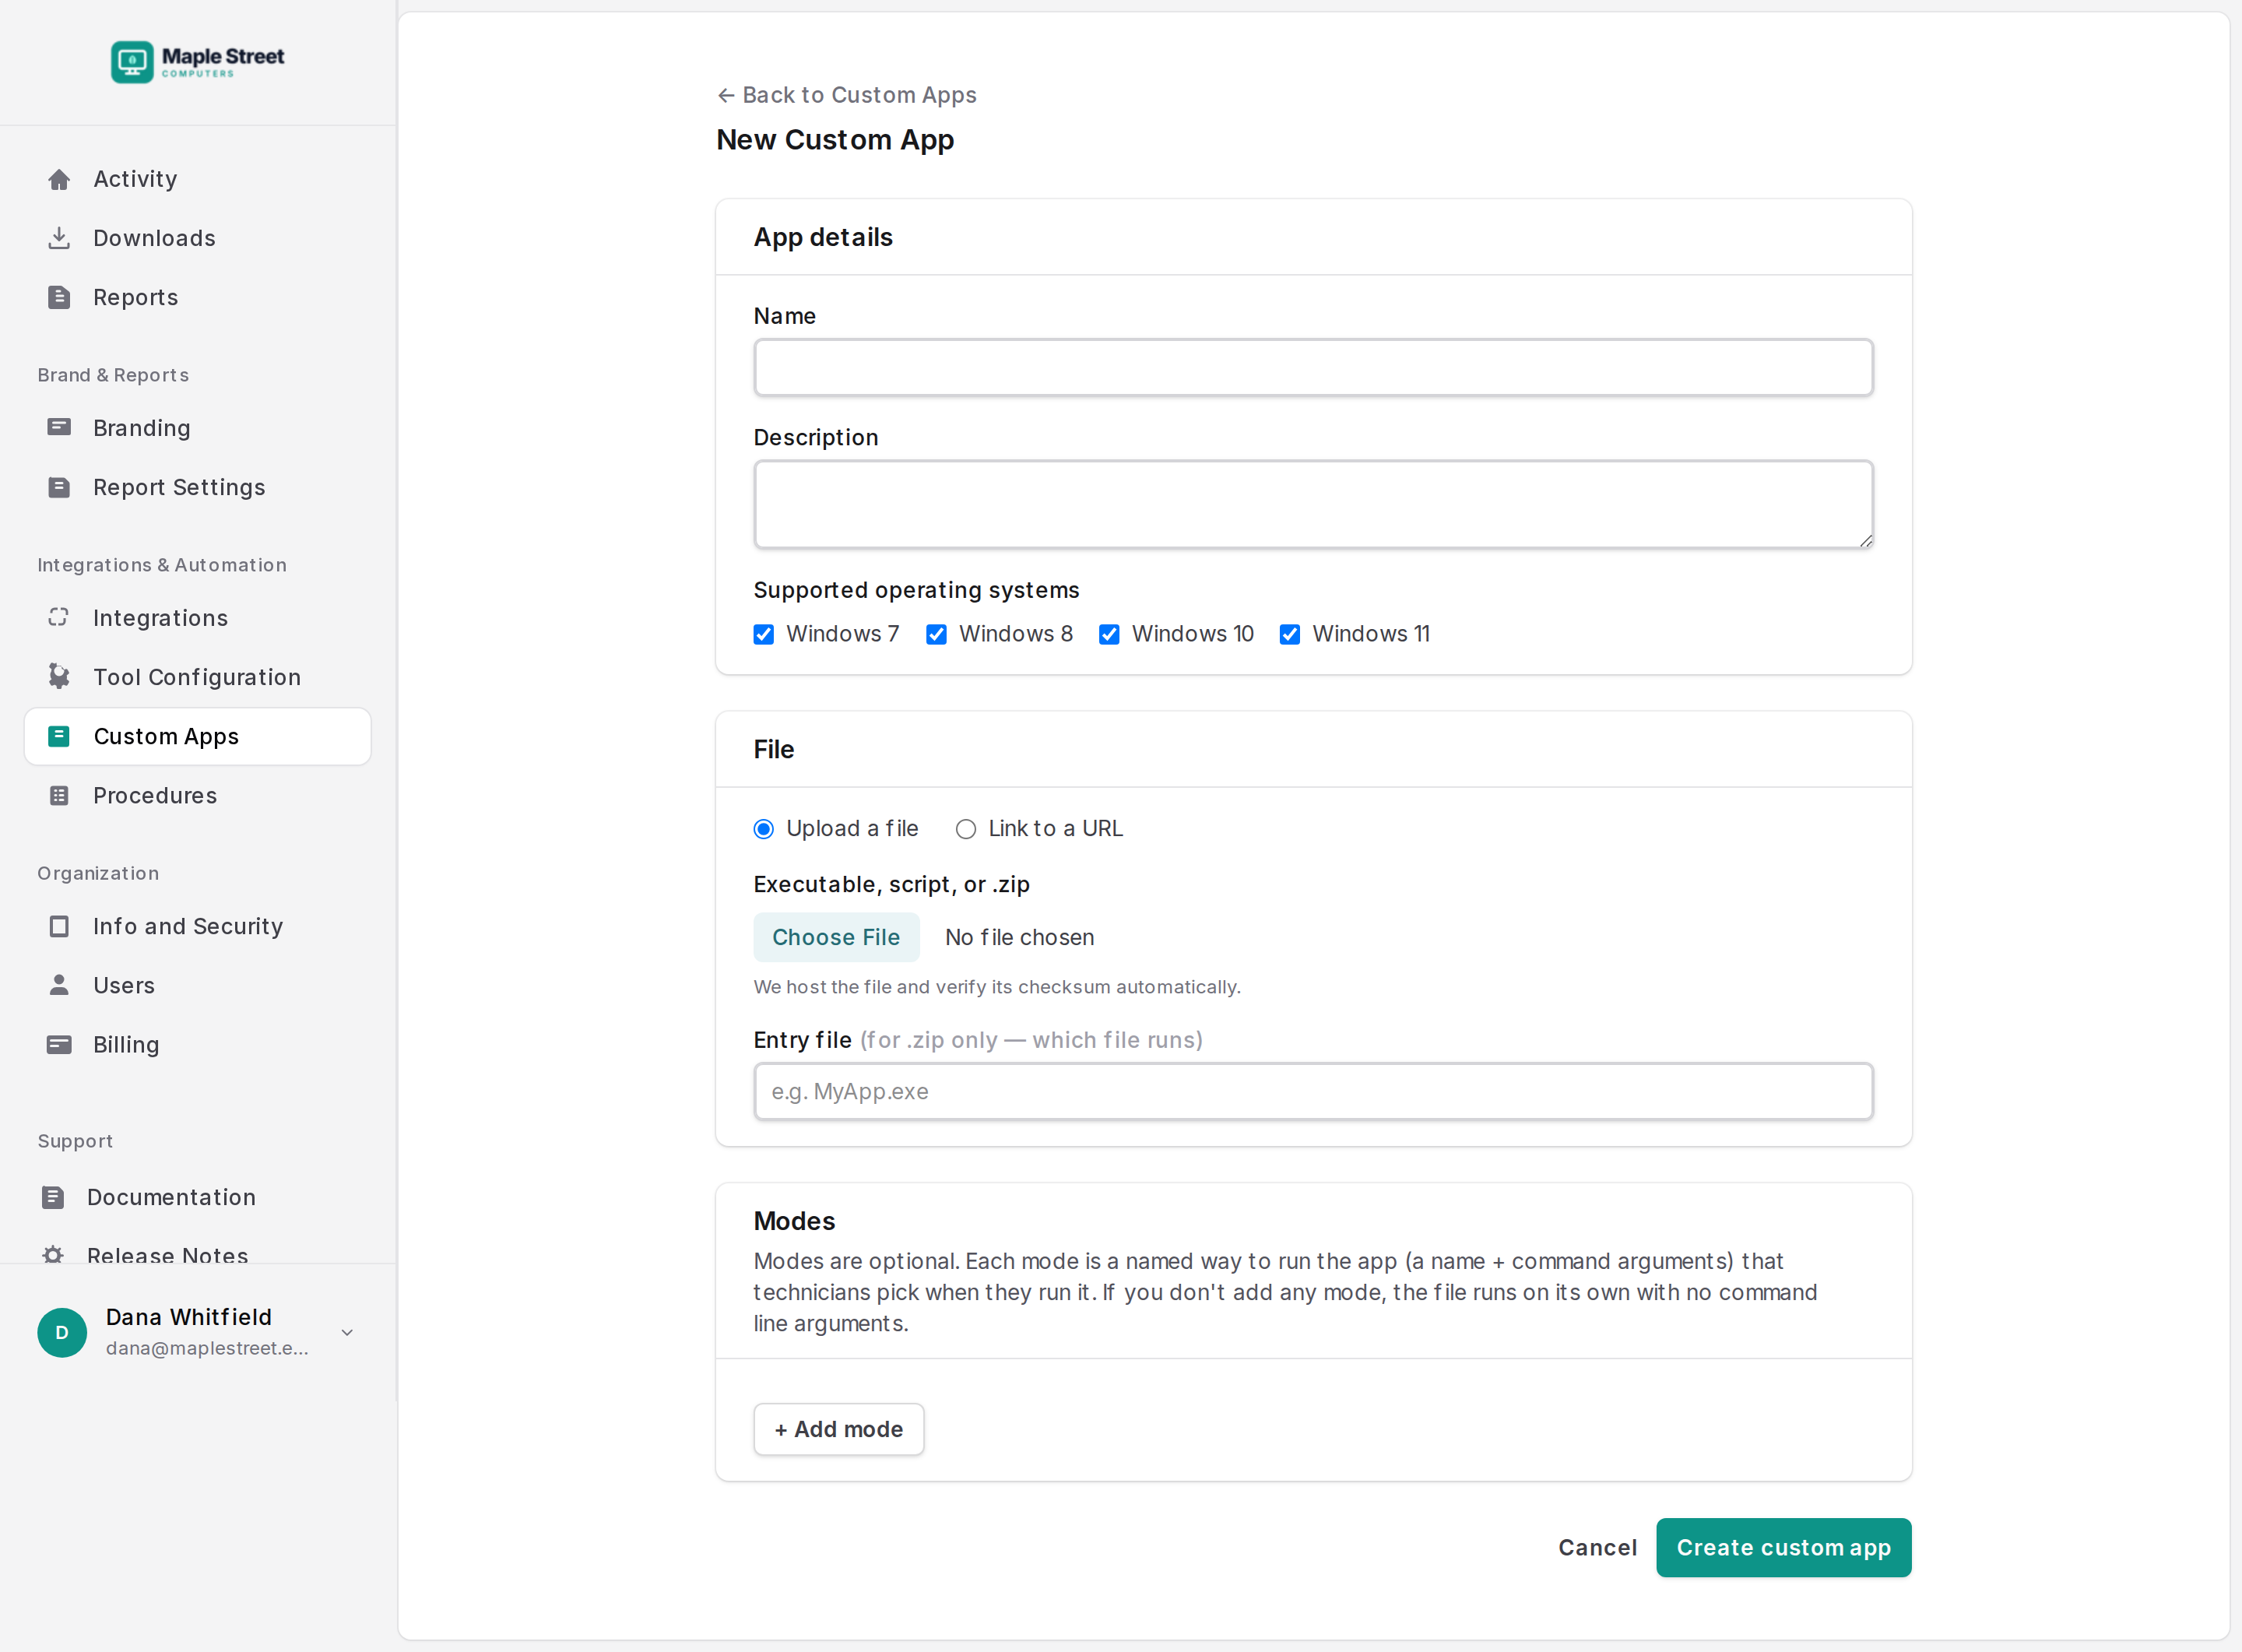
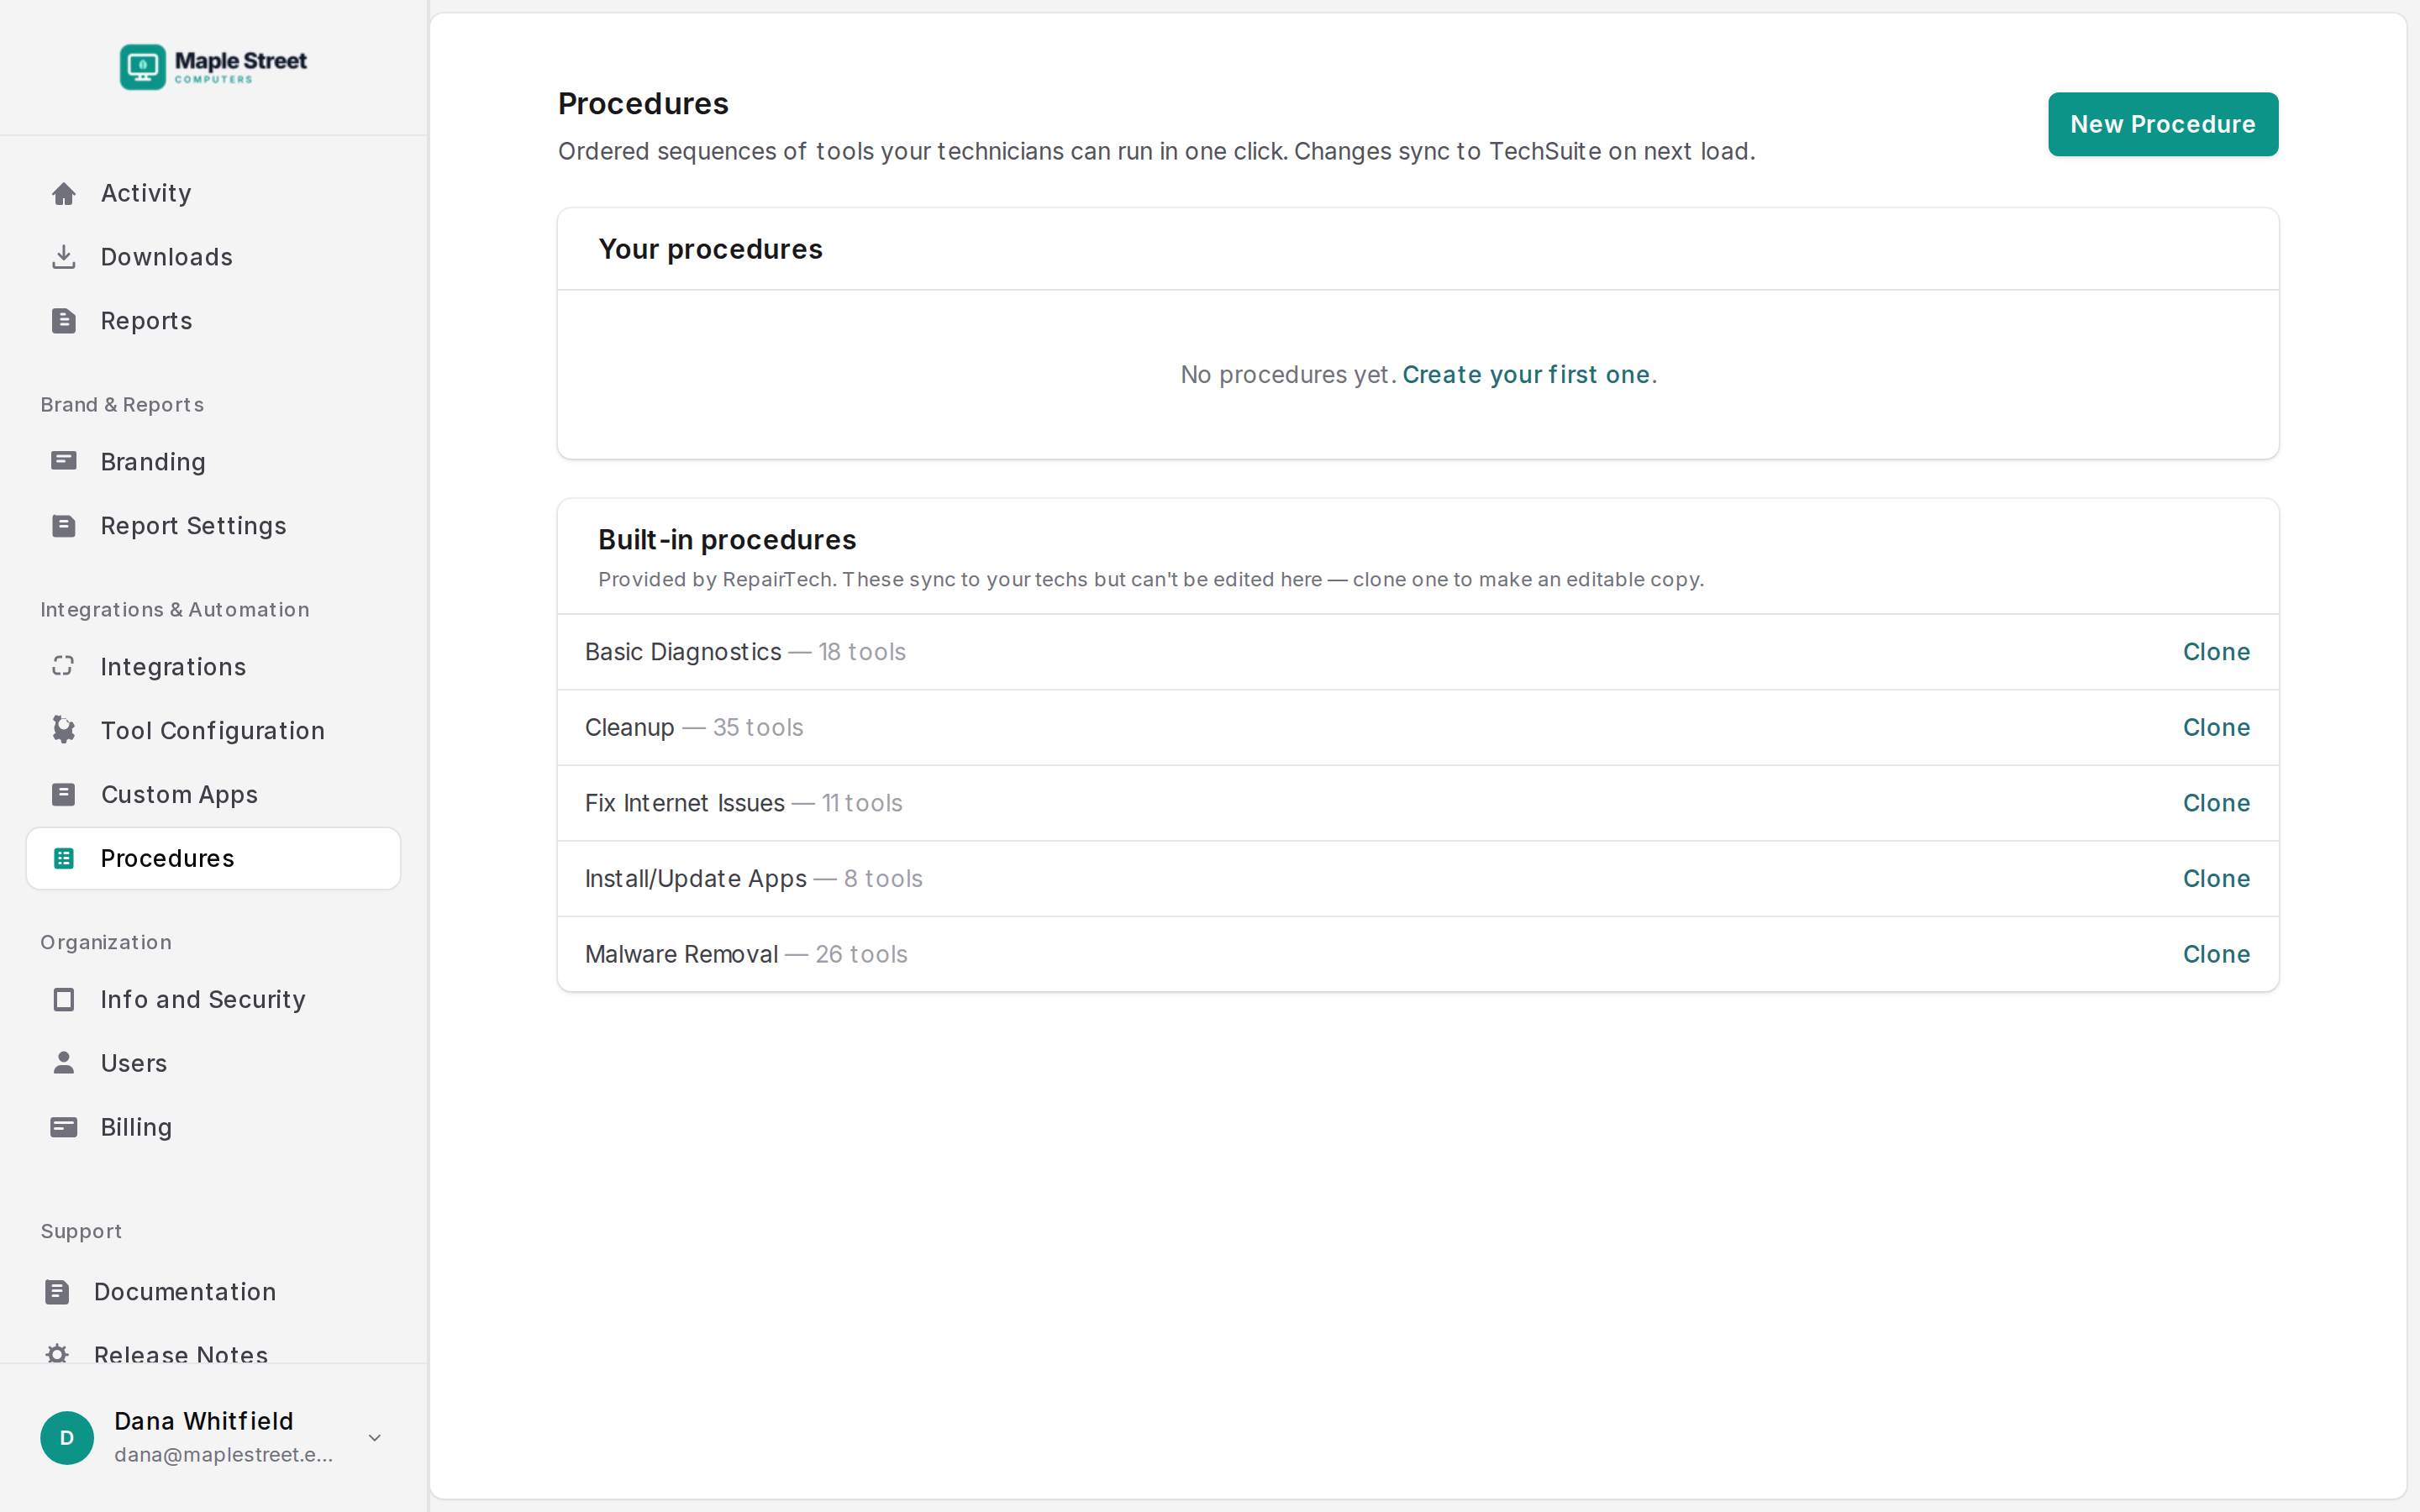
You can create and edit Custom Apps and Procedures in the dashboard as well as in TechSuite. Every copy of TechSuite picks up the changes the next time it starts.
- Custom Apps: click New Custom App to upload a file (
.exe, script or.zip) or link to a download, choose the Windows versions it supports, and add modes (a name plus command-line arguments for each). The page also shows your hosted storage (1 GB per shop) and the files in it. Delete files you no longer use to free up space. - Procedures: click New Procedure, name it, then add and order its tools. To start from one of the default procedures, click Clone next to it under Built-in procedures.
Tool Configuration
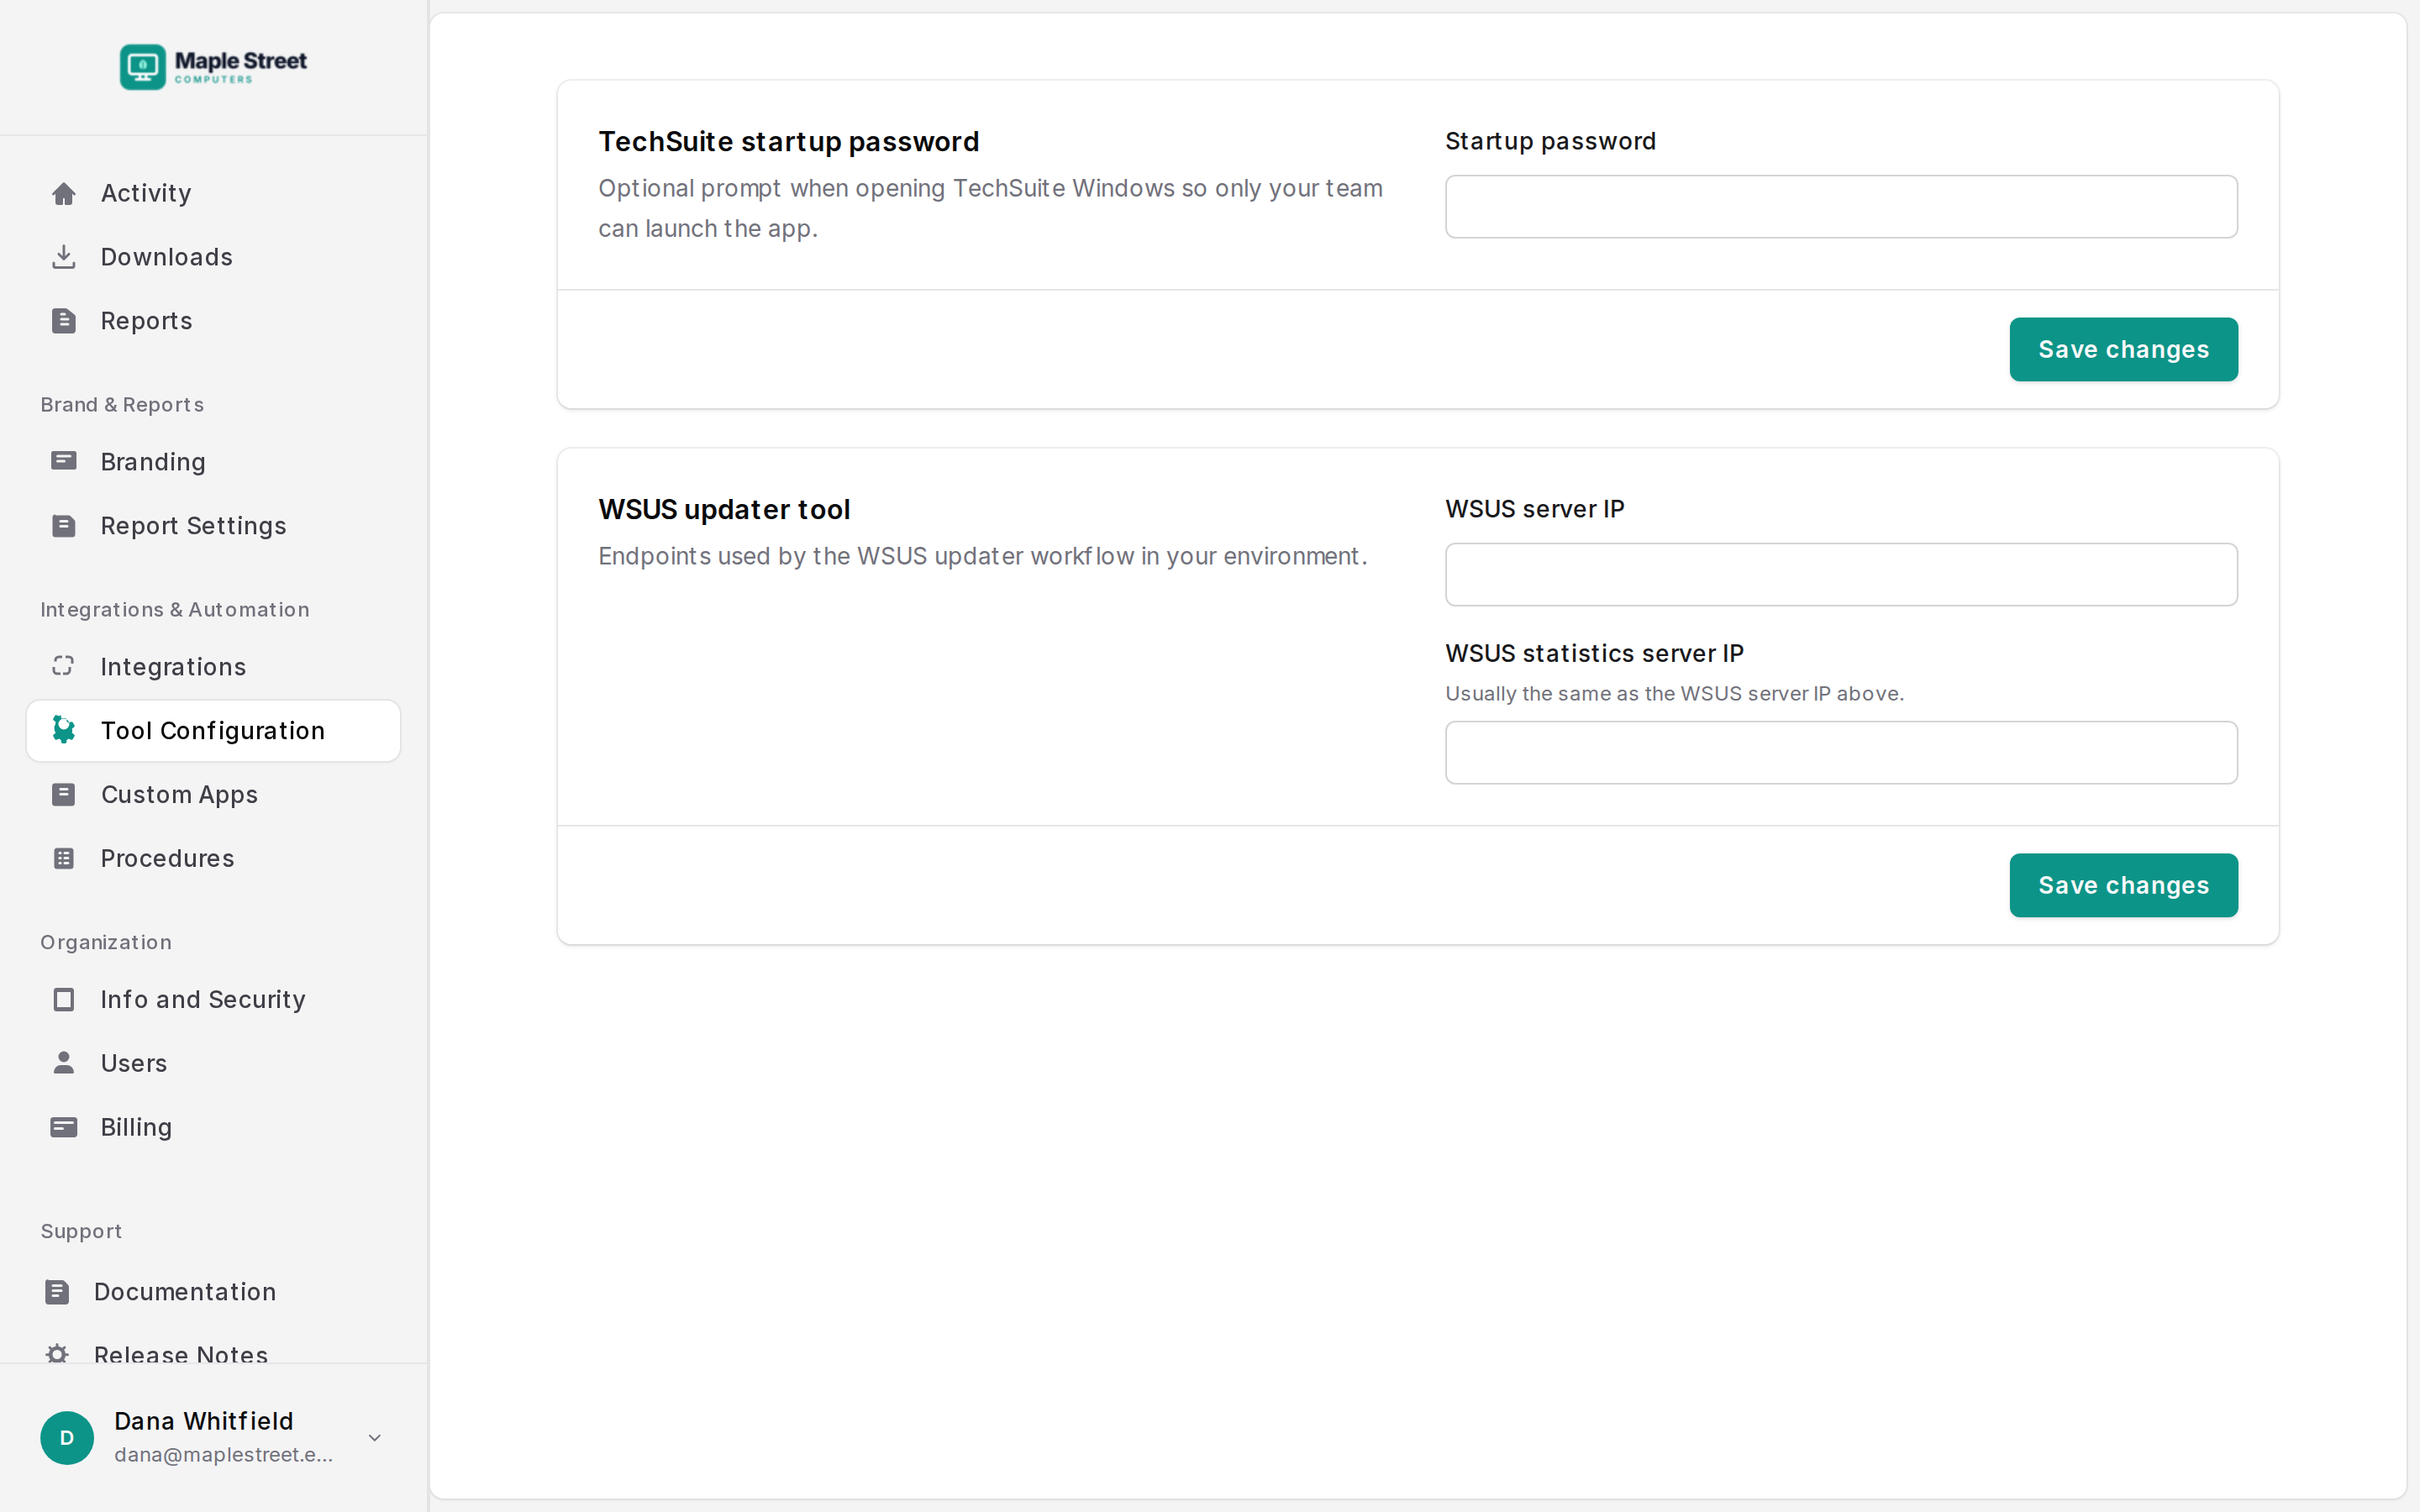
Tool Configuration has two settings:
- TechSuite startup password: a password technicians must enter to open TechSuite.
- WSUS updater tool: your WSUS server addresses, for the Install Updates via WSUS tool.
Downloads
Downloads has the TechSuite Windows app. Copy URL gives you a direct download link to use with an RMM or deployment tool. The link includes your shop’s API key and your technician, so keep it private. See Running TechSuite from an RMM.
Users
Give everyone who runs TechSuite their own login, so every report shows who did the work.
To add someone, go to Users and click Add user. Enter their name and email. They get an email with a link to set a password. Only the account owner can add users.
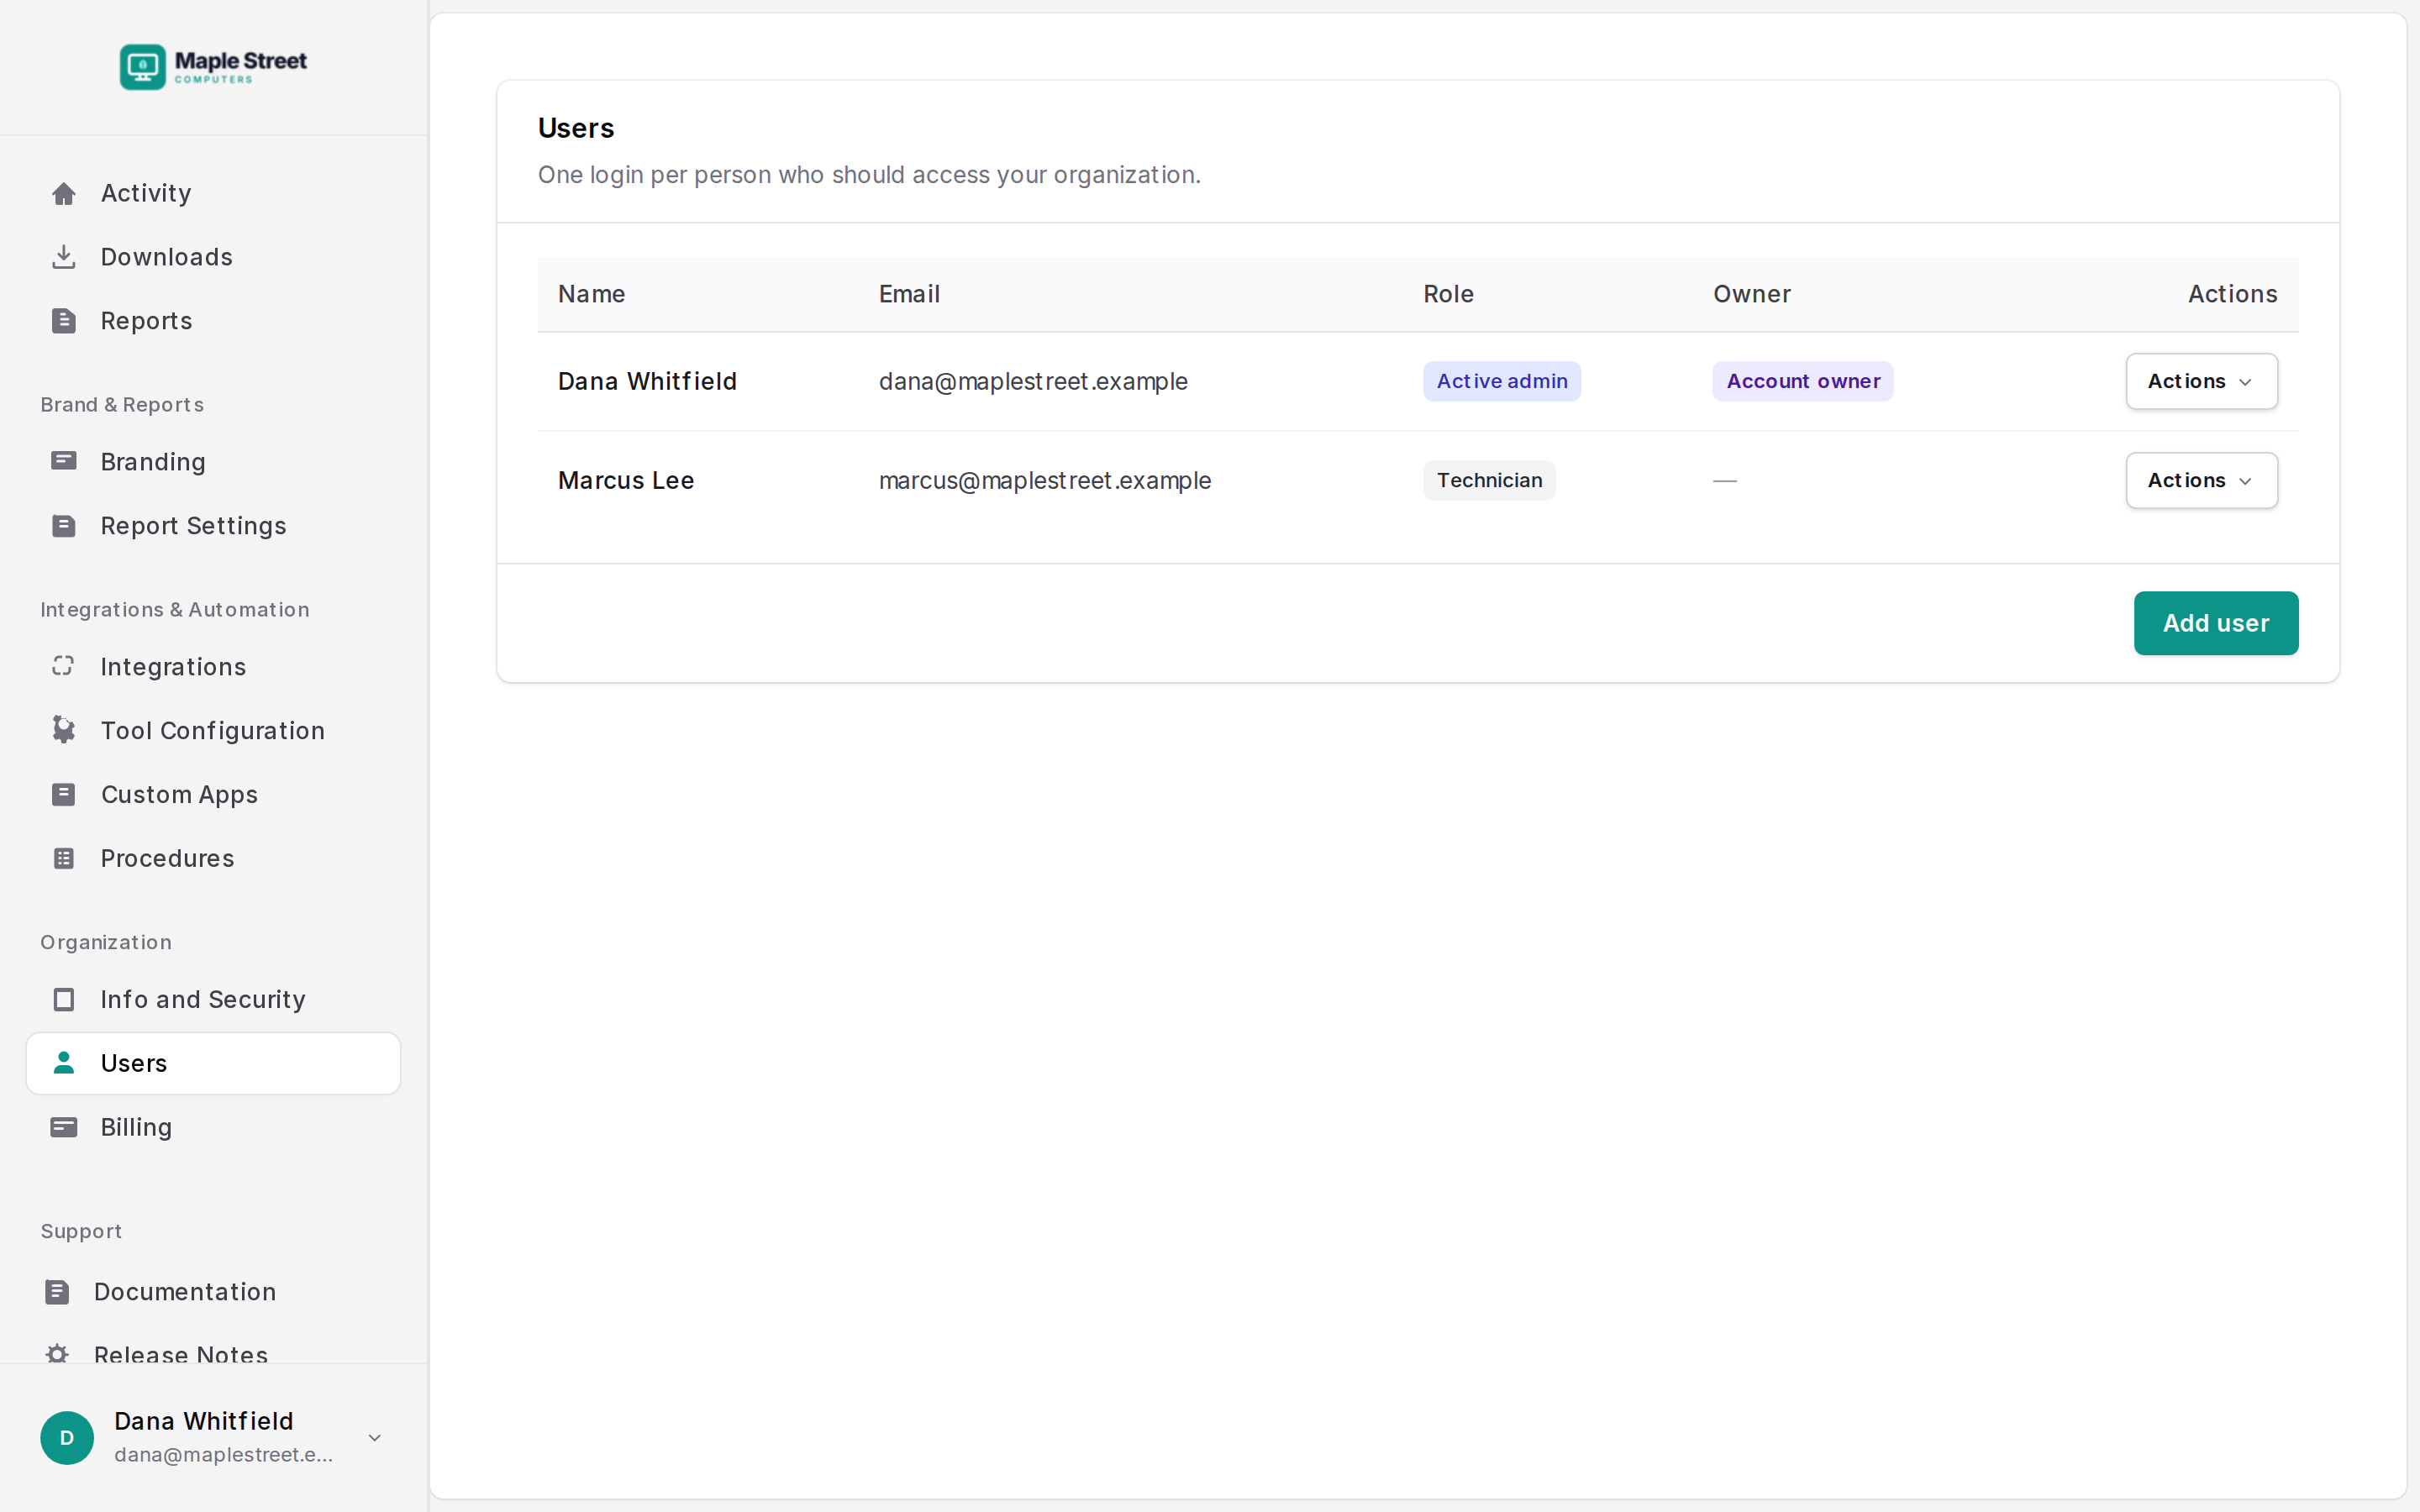
Roles:
- The account owner is the one person who can manage users, billing, branding, integrations, Tool Configuration and Custom Apps. They’re shown as Active admin, or as Observational admin if they don’t run TechSuite themselves.
- Technicians run TechSuite and see the shop’s reports.
- Observational users can see the dashboard but don’t run TechSuite, and don’t count toward your plan’s technician limit.
From a user’s Actions menu, the owner can reset their password or two-factor authentication, remove them, or make them the account owner.
Two-factor authentication
Two-factor authentication (2FA) adds a code from an authenticator app, such as 1Password, Authy or Google Authenticator, to every login.
- The account owner turns on Enable MFA for this organization in Info and Security, and can also Require MFA for all users.
- Each person then sets it up under Profile → Set up two-factor authentication, scanning the QR code with their app. Keep the backup codes you’re shown somewhere safe.
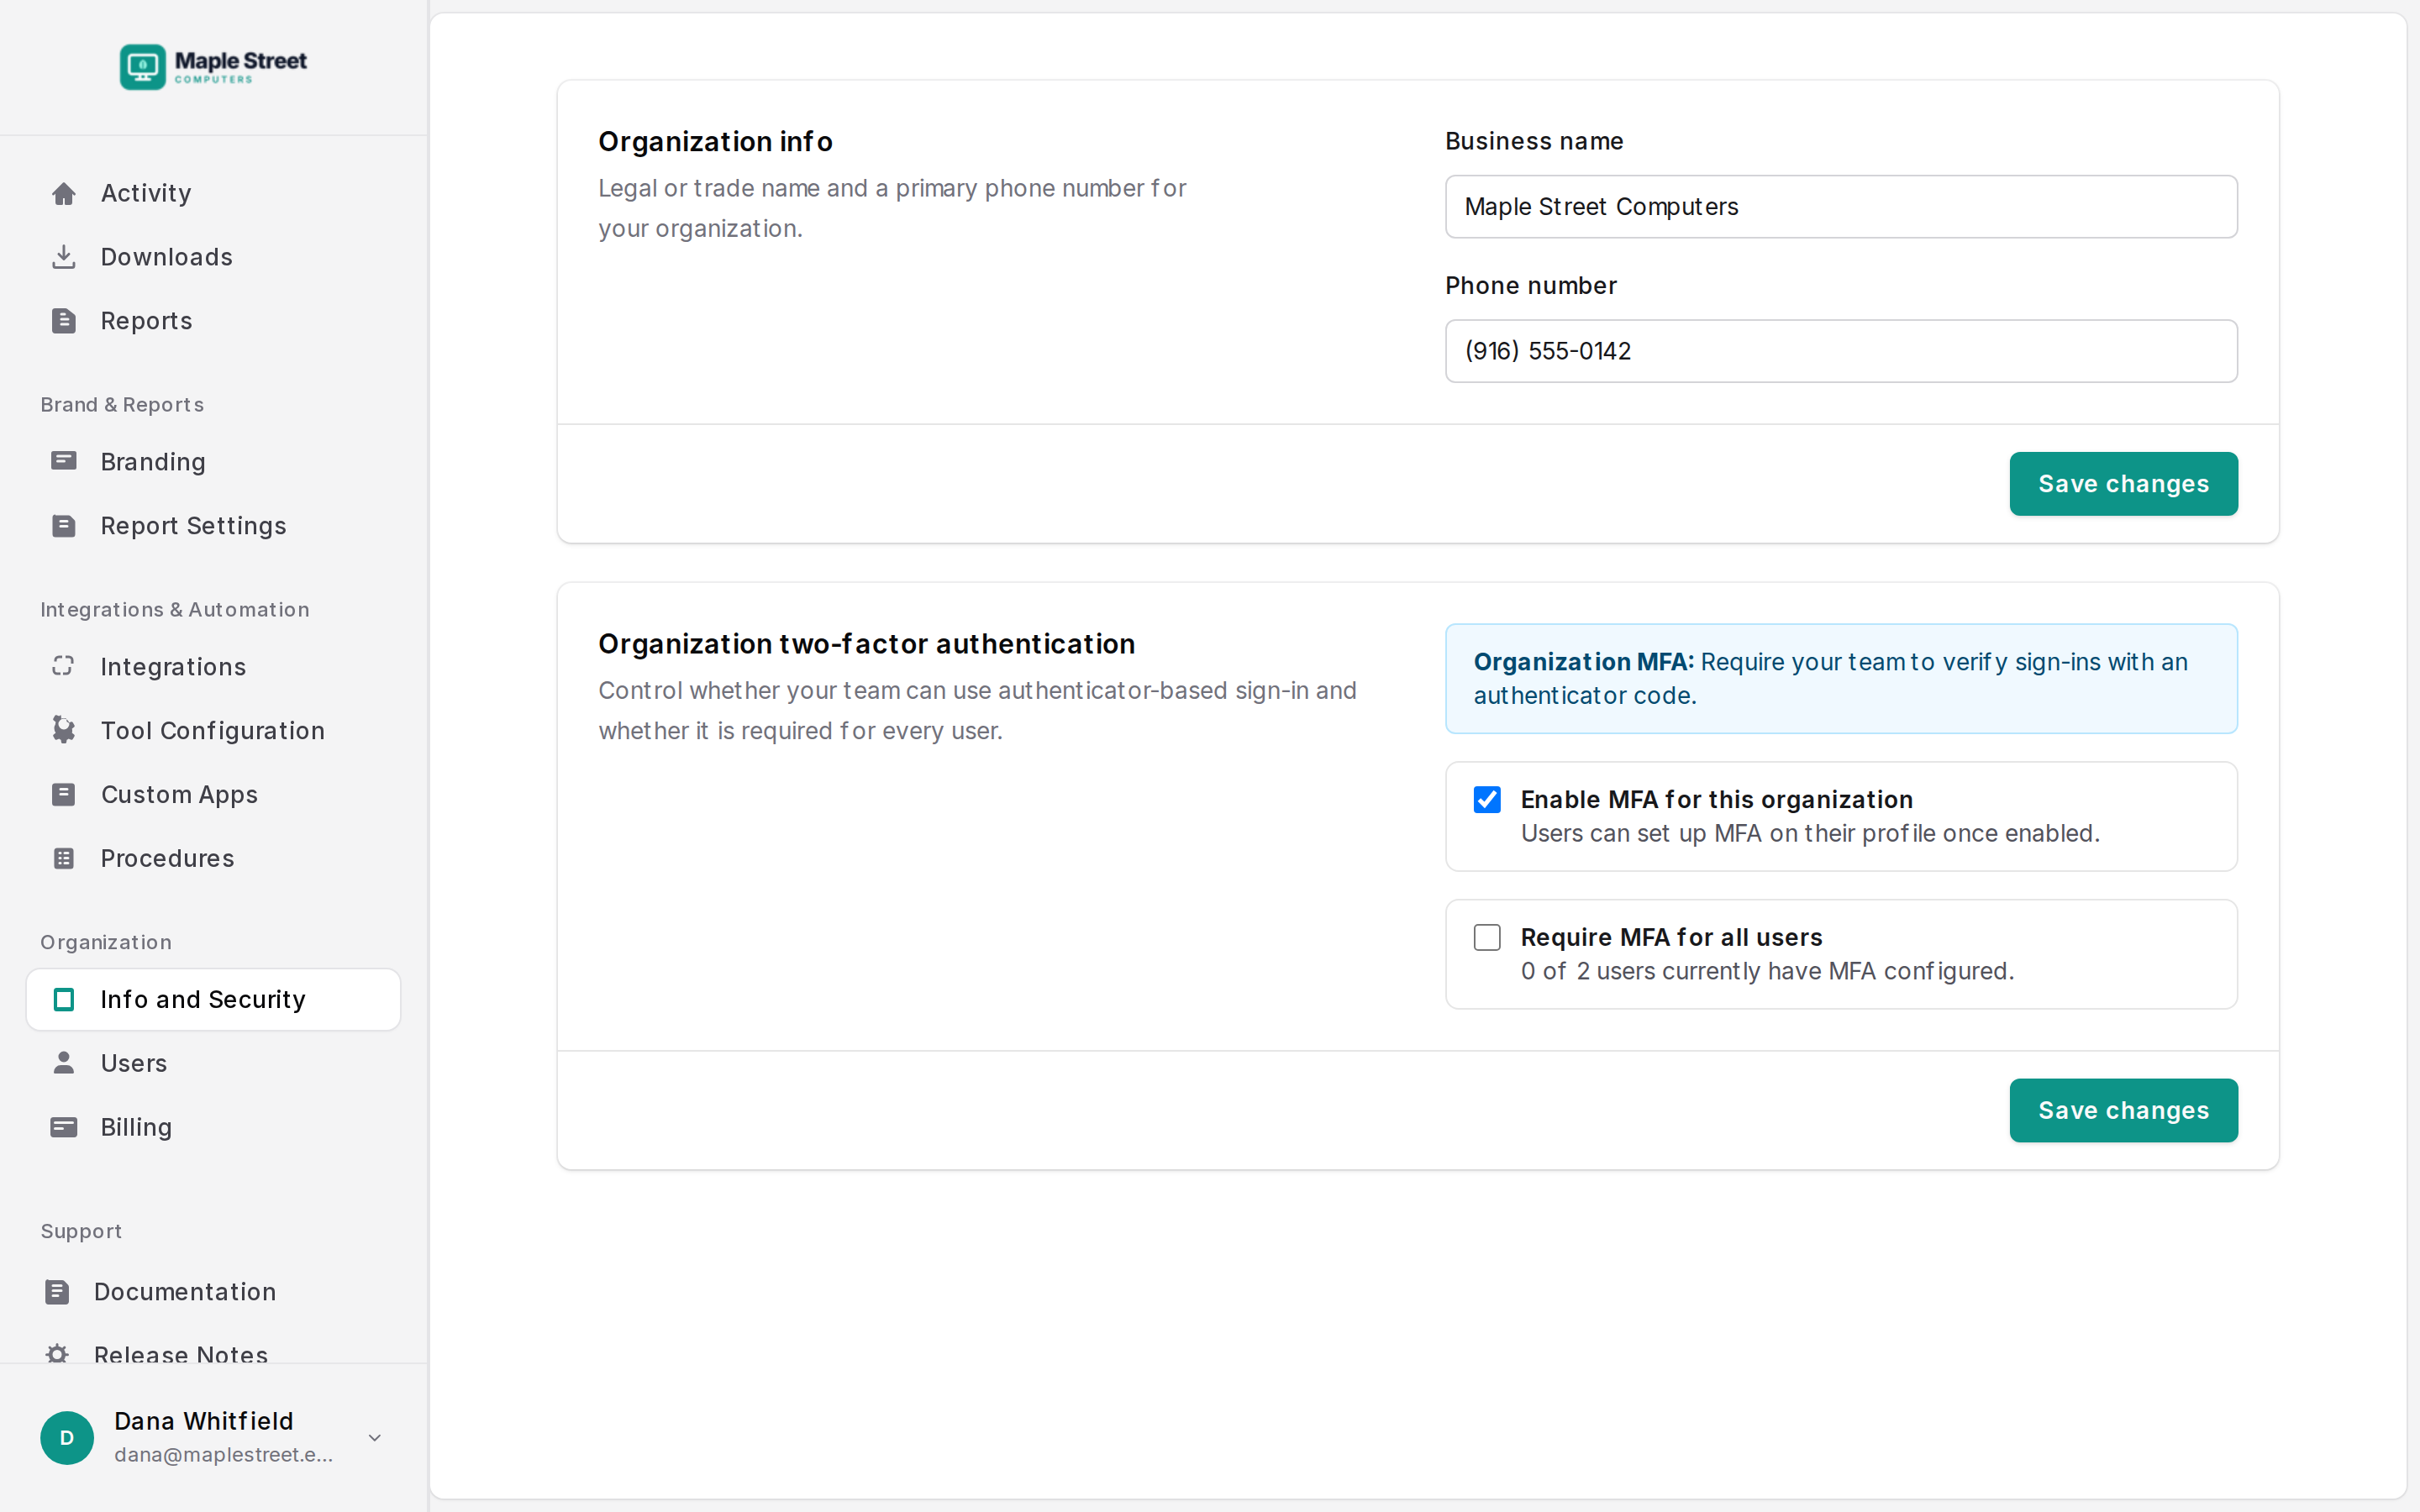
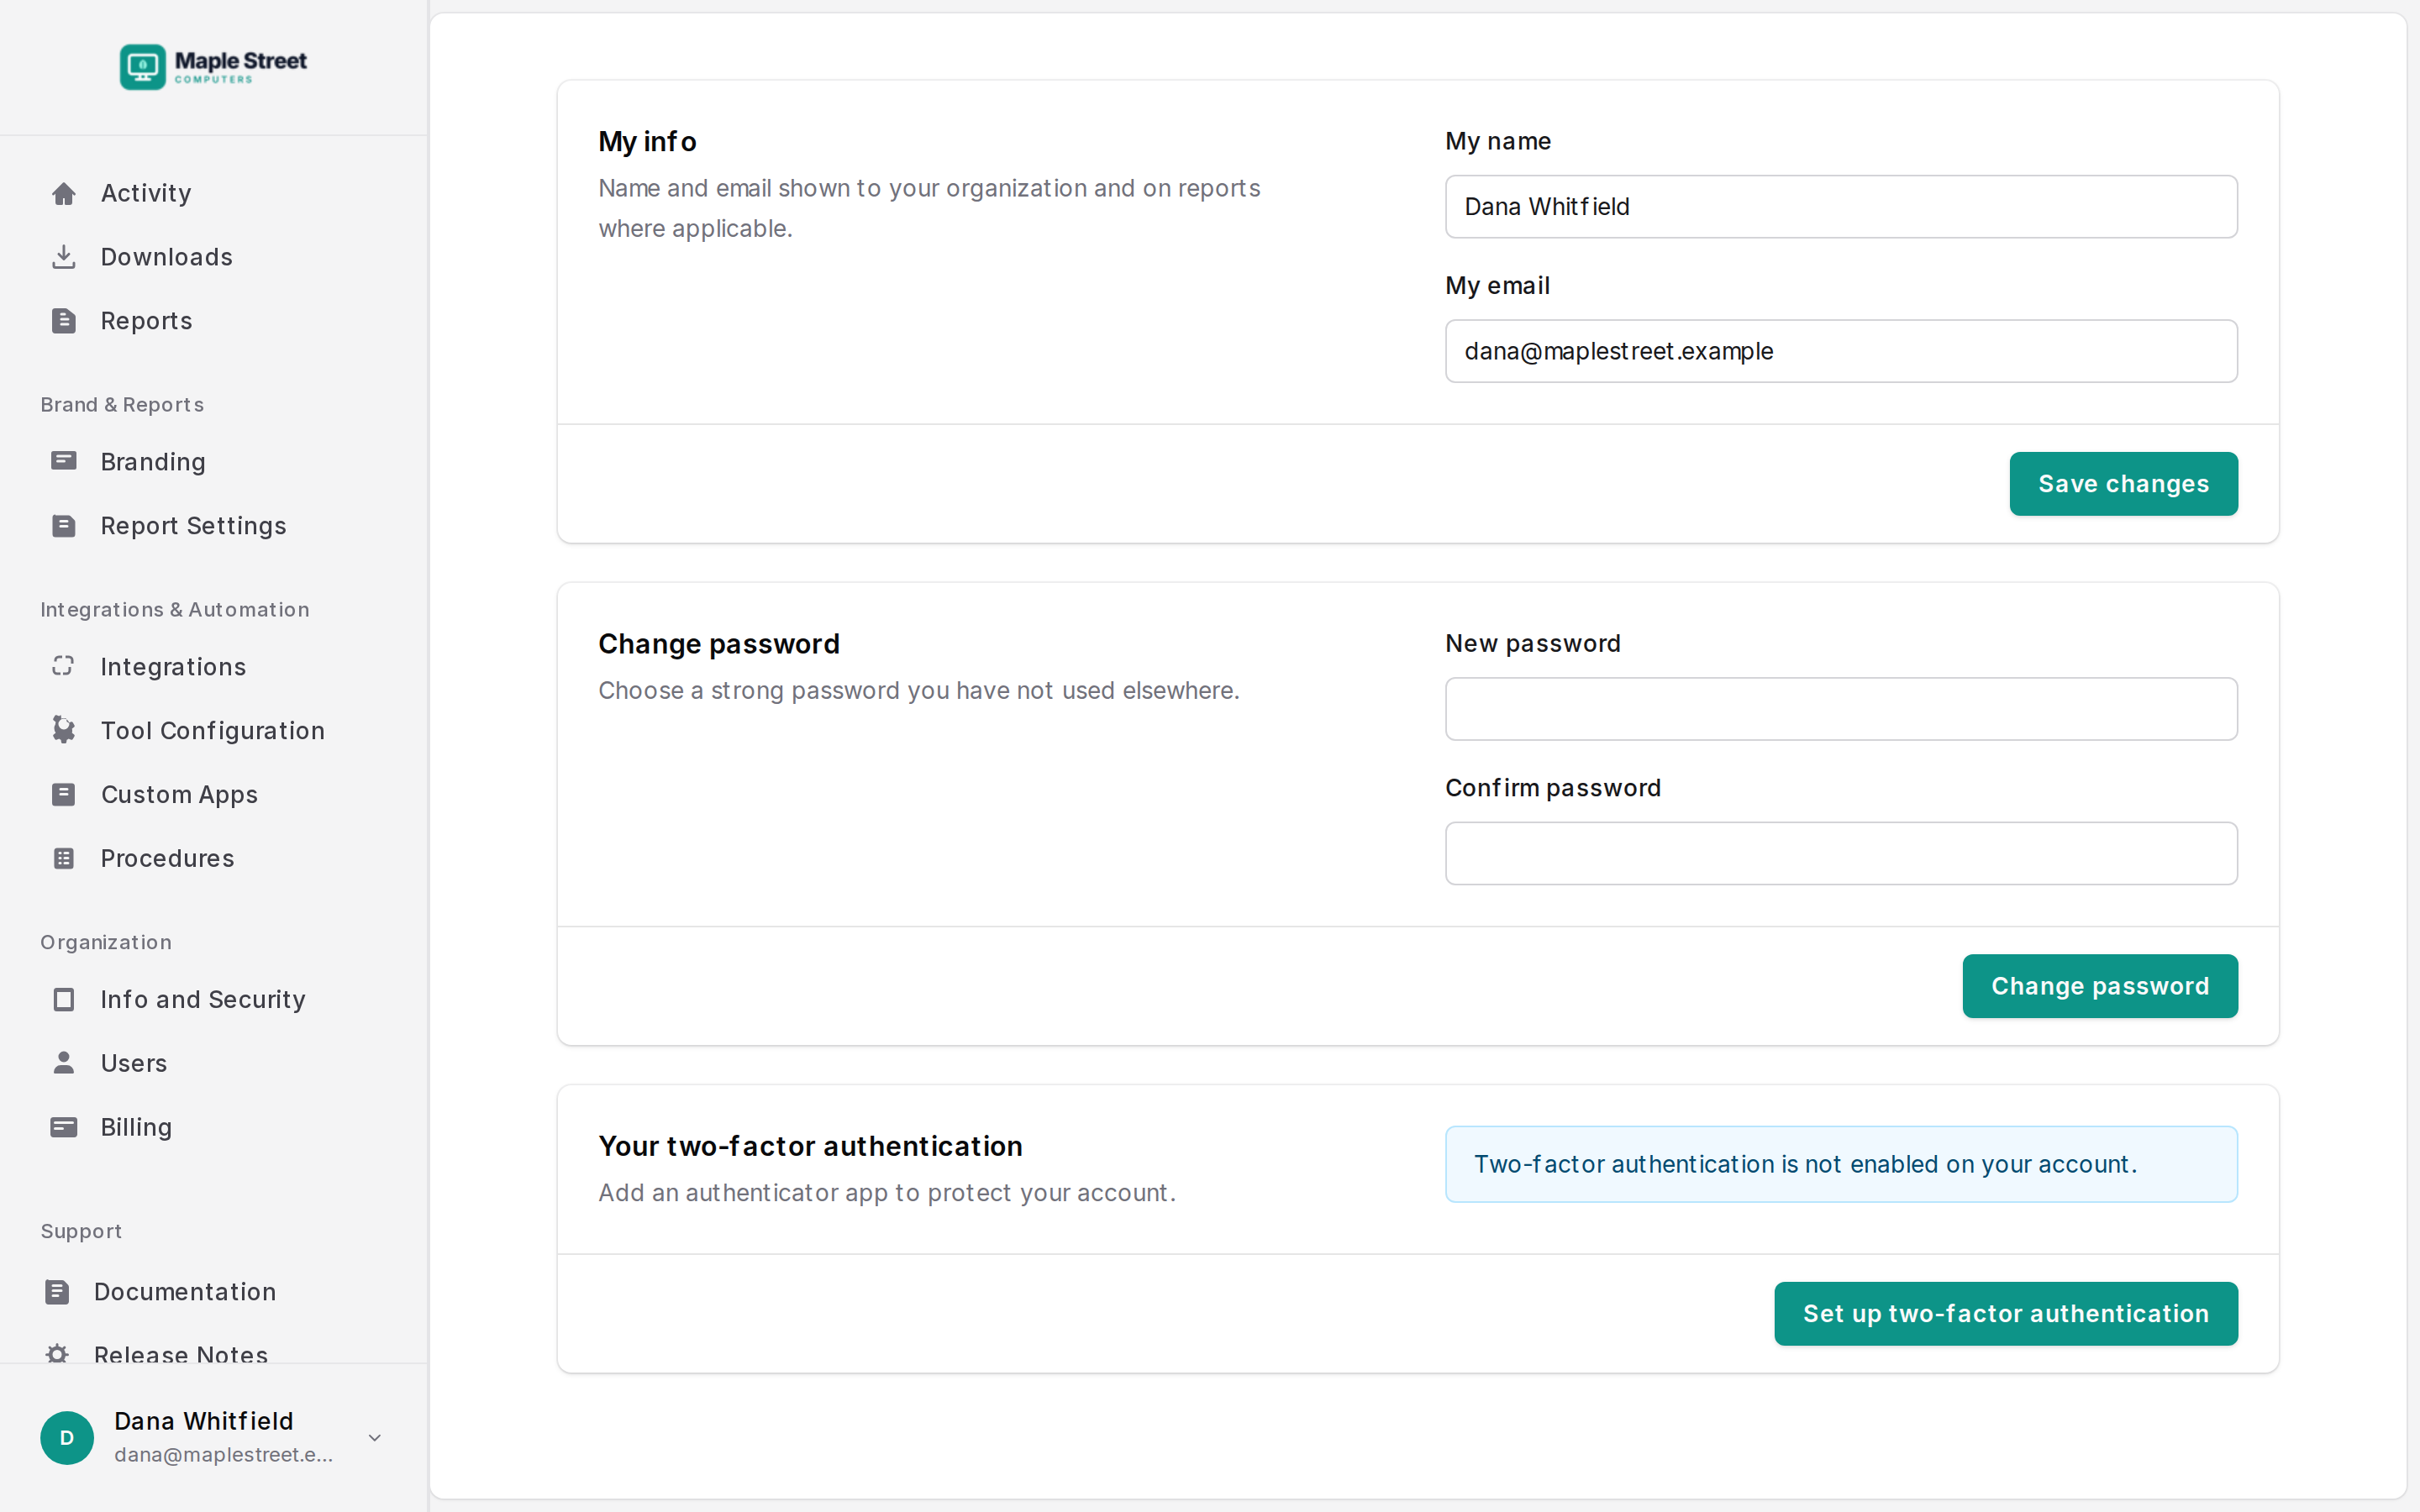
We strongly recommend turning 2FA on for everyone.
Billing
On Billing, the account owner can change the plan (monthly or annual), update the card, and view or download past invoices. To cancel, email support@repairtechsolutions.com.
Integrations
Send reports to your PSA, post updates to Slack, Discord or Teams, and run the Malwarebytes Toolset from TechSuite. See TechSuite Integrations.